One computer, two operating systems, and full hardware acceleration
Introduction
If you’d like to run Ubuntu or another Linux-based system OS primarily but still require a Windows-only GPU-intensive application. One way of achieving this migration to Linux is to run Windows in qemu+kvm (Quick Emulator + Kernel Virtual Machine) and pass a full GPU or a vGPU (Virtual GPU ) through to Windows.
Requirements
To run Windows virtualized on Linux, you’ll require a suitable CPU with at least four cores, although six or more with hyperthreading is recommended. You’ll also need to ensure you have at least 16GiB of memory and that your CPU and motherboard support the virtualization technologies shown below.
- An Intel CPU supporting VT-d
- An AMD GPU supporting IOMMU (AMD-Vi)
For the GPU, you’ll need one of the following configurations.
- Two dGPUs (discrete GPUs), one for Linux and one for Windows
- An iGPU (integrated GPU) for Linux and a dGPU for Windows
- An iGPU or a dGPU for Linux and a vGPU (Virtual GPU) for Windows
Virtual GPU support is available in prosumer and enterprise cards such as the NVIDIA Quadro or GRIDS cards, AMD Instinct, and some Radeon Pro cards. Additionally, the 5th to 9th-generation Intel CPUs with integrated graphics support GVT-g; however, unlike the AMD or NVIDIA solutions, they are less performant. Note that some of the vGPU solutions also require a license.
In addition to supporting virtualization, you’ll also need to ensure your motherboard has enough PCIe lines to support the necessary GPUs. You’ll want at least x8 (8 lanes) at PCIe 3 or more speeds per dGPU; for the iGPU, it should be fine as long as your motherboard can support the correct number of video outputs. One thing to note when you’re checking this is that PCIe has both physical and electrical lanes, which can cause issues since some motherboards can have x16 PCIe physical lanes, but electrically, it may be 8x or less.
The last thing you’ll need is a dummy plug that emulates a physical monitor; without this, Windows will turn off the video output. Below are affiliate links for dummy plugs for various port types that I’ve tested.
| Description | Link |
|---|---|
| Mini Display Port | Amazon |
| Display Port | Amazon |
| 8 x Display Port | Amazon |
| HDMI | Amazon |
| 5 x HDMI | Amazon |
| 3 x DVI | Amazon |
This post contains affiliate links, which means I may earn a commission if you purchase through these links; this does not increase the amount you pay for the items.
Host Setup
Now that you have your hardware requirements out the way, we’ll begin configuring the hardware, transition to the software configuration, and finally finish by setting up the virtual machine.
BIOS Configuration
You’ll need to boot to the BIOS to enable virtualization features; this will differ depending on the maker or your computer/motherboard. See the table below to determine the proper key to hold while powering on the computer.
| Maker | Key(s) |
|---|---|
| ASRock | F2 or Delete |
| ASUS | F2 or Delete |
| Acer | F2 or Delete |
| Dell | F2 or F12 |
| Gigabyte | F2 or DEL |
| HP | F10 |
| Lenovo | F2 or Fn + F2 |
| MSI | Delete |
| Origin PC | F2 |
| Samsung | F2 |
| System76 | F2 |
| Toshiba | F2 |
| Zotac | Delete |
If you have a systemd-based Linux distribution such as Ubuntu or Debian, you can use this command to reboot into the BIOS setup.
1systemctl reboot --firmware-setup
Once the BIOS is loaded, search for and enable VT-d and VT-x for Intel CPUs or IOMMU (AMD-Vi) for AMD CPUs. Note some motherboards may list VT-d as virtualization or IOMMU. While still in the BIOS, you may want to adjust your GPU settings to boot using the primary GPU for the display, and if you choose to utilize a combination with an iGPU, you should configure the graphics memory and mode for it.
After changing all the required settings, save the changes and reboot.
Install Needed Packages
Either open your package manager and install these packages:
- virt-manager
- qemu-kvm
- qemu-utils
- libvirt-daemon-system
- libvirt-clients
- bridge-utils
- ovmf
- cmake
- gcc
- g++
- clang
- libegl-dev
- libgl-dev
- libgles-dev
- libfontconfig-dev
- libgmp-dev
- libspice-protocol-dev
- make
- nettle-dev
- pkg-config
- binutils-dev
- libx11-dev
- libxfixes-dev
- libxi-dev
- libxinerama-dev
- libxss-dev
- libxcursor-dev
- libxpresent-dev
- libxkbcommon-dev
- libwayland-bin
- libwayland-dev
- wayland-protocols
- libpipewire-0.3-dev
- libsamplerate0-dev
- libpulse-dev
- libsamplerate0-dev
- fonts-dejavu-core
- libdecor-0-dev
- wget
Or you can run this command:
1sudo apt install -y virt-manager qemu-kvm qemu-utils libvirt-daemon-system libvirt-clients bridge-utils ovmf cmake gcc g++ clang libegl-dev libgl-dev libgles-dev libfontconfig-dev libgmp-dev libspice-protocol-dev make nettle-dev pkg-config binutils-dev libx11-dev libxfixes-dev libxi-dev libxinerama-dev libxss-dev libxcursor-dev libxpresent-dev libxkbcommon-dev libwayland-bin libwayland-dev wayland-protocols libpipewire-0.3-dev libsamplerate0-dev libpulse-dev libsamplerate0-dev fonts-dejavu-core libdecor-0-dev wget
Download the Windows ISO from here and the VirtIO Drivers to the libvirt images directory.
1# Download and copy the virtio drivers
2wget https://fedorapeople.org/groups/virt/virtio-win/direct-downloads/stable-virtio/virtio-win.iso
3sudo mv virtio-win.iso /var/lib/libvirt/images
4
5# move the Windows installer ISO to the libvirt images directory (you may have to change the name of the file in this command)
6sudo mv ~/Downloads/Win10_22H2_English_x64v1.iso /var/lib/libvirt/images
To use virt-manager, you must be in the proper group; add yourself to the group with the following command.
1sudo usermod -a -G libvirt $USER
Isolate and Detach the GPU
To pass the second to the Windows virtual machine, you must isolate and detach it from the host; this will keep the host from using the GPU.
The first thing to do is locate the IDs of the GPU you want to passthrough; you can do this using the following command.
1lspci -nn
Example output from the command.
 100:00.0 Host bridge [0600]: Intel Corporation 8th/9th Gen Core 8-core Desktop Processor Host Bridge/DRAM Registers [Coffee Lake S] [8086:3e30] (rev 0d)
 200:01.0 PCI bridge [0604]: Intel Corporation 6th-10th Gen Core Processor PCIe Controller (x16) [8086:1901] (rev 0d)
 300:02.0 Display controller [0380]: Intel Corporation CoffeeLake-S GT2 [UHD Graphics 630] [8086:3e98] (rev 02)
 400:08.0 System peripheral [0880]: Intel Corporation Xeon E3-1200 v5/v6 / E3-1500 v5 / 6th/7th/8th Gen Core Processor Gaussian Mixture Model [8086:1911]
 500:12.0 Signal processing controller [1180]: Intel Corporation Cannon Lake PCH Thermal Controller [8086:a379] (rev 10)
 600:14.0 USB controller [0c03]: Intel Corporation Cannon Lake PCH USB 3.1 xHCI Host Controller [8086:a36d] (rev 10)
 700:14.2 RAM memory [0500]: Intel Corporation Cannon Lake PCH Shared SRAM [8086:a36f] (rev 10)
 800:16.0 Communication controller [0780]: Intel Corporation Cannon Lake PCH HECI Controller [8086:a360] (rev 10)
 900:17.0 SATA controller [0106]: Intel Corporation Cannon Lake PCH SATA AHCI Controller [8086:a352] (rev 10)
1000:1b.0 PCI bridge [0604]: Intel Corporation Cannon Lake PCH PCI Express Root Port #17 [8086:a340] (rev f0)
1100:1b.4 PCI bridge [0604]: Intel Corporation Cannon Lake PCH PCI Express Root Port #21 [8086:a32c] (rev f0)
1200:1c.0 PCI bridge [0604]: Intel Corporation Cannon Lake PCH PCI Express Root Port #1 [8086:a338] (rev f0)
1300:1c.2 PCI bridge [0604]: Intel Corporation Cannon Lake PCH PCI Express Root Port #3 [8086:a33a] (rev f0)
1400:1f.0 ISA bridge [0601]: Intel Corporation Z390 Chipset LPC/eSPI Controller [8086:a305] (rev 10)
1500:1f.3 Audio device [0403]: Intel Corporation Cannon Lake PCH cAVS [8086:a348] (rev 10)
1600:1f.4 SMBus [0c05]: Intel Corporation Cannon Lake PCH SMBus Controller [8086:a323] (rev 10)
1700:1f.5 Serial bus controller [0c80]: Intel Corporation Cannon Lake PCH SPI Controller [8086:a324] (rev 10)
1800:1f.6 Ethernet controller [0200]: Intel Corporation Ethernet Connection (7) I219-V [8086:15bc] (rev 10)
1901:00.0 PCI bridge [0604]: Advanced Micro Devices, Inc. [AMD/ATI] Navi 10 XL Upstream Port of PCI Express Switch [1002:1478] (rev c7)
2002:00.0 PCI bridge [0604]: Advanced Micro Devices, Inc. [AMD/ATI] Navi 10 XL Downstream Port of PCI Express Switch [1002:1479]
2103:00.0 VGA compatible controller [0300]: Advanced Micro Devices, Inc. [AMD/ATI] Navi 23 [Radeon RX 6600/6600 XT/6600M] [1002:73ff] (rev c7)
2203:00.1 Audio device [0403]: Advanced Micro Devices, Inc. [AMD/ATI] Navi 21 HDMI Audio [Radeon RX 6800/6800 XT / 6900 XT] [1002:ab28]
2304:00.0 Non-Volatile memory controller [0108]: Sandisk Corp WD Black SN750 / PC SN730 NVMe SSD [15b7:5006]
2405:00.0 VGA compatible controller [0300]: NVIDIA Corporation GP104GL [Quadro P4000] [10de:1bb1] (rev a1)
2505:00.1 Audio device [0403]: NVIDIA Corporation GP104 High Definition Audio Controller [10de:10f0] (rev a1)
2607:00.0 USB controller [0c03]: Renesas Technology Corp. uPD720201 USB 3.0 Host Controller [1912:0014] (rev 03)
You’ll want to locate the VGA compatible controller and Audio device belonging to the GPU you wish to passthrough from your output; note that some GPUs won’t have an Audio device. Once you’ve located these, you’ll want to record the numbers in the square brackets near the end of the line. My numbers were 10de:1bb1 for the VGA compatible controller and 10de:10f0 for the Audio device.
Next, you’ll edit the file /etc/default/grub. You can use whatever editor you’d like or edit it with nano as I’ve done below.
1sudo nano /etc/default/grub
Locate the GRUB_CMDLINE_LINUX_DEFAULT field in the file and add the proper content while keeping whatever existing parameters intact.
For AMD, add iommu=pt amd_iommu=on the result should look like the line below.
1GRUB_CMDLINE_LINUX_DEFAULT="iommu=pt amd_iommu=on"
For Intel, add iommu=pt intel_iommu=on the result should look like the line below.
1GRUB_CMDLINE_LINUX_DEFAULT="iommu=pt intel_iommu=on"
The above changes enable support for passing a GPU or other hardware through to the virtual machine. While you still have the file open, add vfio-pci.ids= followed by your list of IDs from earlier separated by a comma (,). The result will look like the following.
For AMD:
1GRUB_CMDLINE_LINUX_DEFAULT="iommu=pt amd_iommu=on vfio-pci.ids=10de:1bb1,10de:10f0"
For Intel:
1GRUB_CMDLINE_LINUX_DEFAULT="iommu=pt intel_iommu=on vfio-pci.ids=10de:1bb1,10de:10f0"
This parameter tells the Linux host not to use the devices directly but to reserve them for the virtual machine. After you’ve made your edits, save the changes, update Grub, and reboot.
1sudo update-grub
Next, you’ll need to ensure the devices you’re passing through the virtual machine are not in an IOMMU group with something that can’t be passed through, such as your ISA bridge.
Create a file called iommu_groups and fill in the following content; this script is from the Arch Linux wiki.
1#!/bin/bash
2shopt -s nullglob
3for g in $(find /sys/kernel/iommu_groups/* -maxdepth 0 -type d | sort -V); do
4    echo "IOMMU Group ${g##*/}:"
5    for d in $g/devices/*; do
6        echo -e "\t$(lspci -nns ${d##*/})"
7    done;
8done;
Make the script executable
1chmod +x ./iommu_groups
Move the shell script if you want to be able to use it from anywhere.
1sudo mv iommu_groups /usr/local/bin/iommu_groups
Run the iommu_groups script and check your output to ensure that the devices you’ll pass to the virtual machine are in a group by themselves; if not, you may change the PCIe location of the GPU or look into using ACS override. Below, you can see my output has the devices from earlier in the isolated group 14.
 1IOMMU Group 0:
 2	00:00.0 Host bridge [0600]: Intel Corporation 8th/9th Gen Core 8-core Desktop Processor Host Bridge/DRAM Registers [Coffee Lake S] [8086:3e30] (rev 0d)
 3IOMMU Group 1:
 4	00:01.0 PCI bridge [0604]: Intel Corporation 6th-10th Gen Core Processor PCIe Controller (x16) [8086:1901] (rev 0d)
 5	01:00.0 PCI bridge [0604]: Advanced Micro Devices, Inc. [AMD/ATI] Navi 10 XL Upstream Port of PCI Express Switch [1002:1478] (rev c7)
 6	02:00.0 PCI bridge [0604]: Advanced Micro Devices, Inc. [AMD/ATI] Navi 10 XL Downstream Port of PCI Express Switch [1002:1479]
 7	03:00.0 VGA compatible controller [0300]: Advanced Micro Devices, Inc. [AMD/ATI] Navi 23 [Radeon RX 6600/6600 XT/6600M] [1002:73ff] (rev c7)
 8	03:00.1 Audio device [0403]: Advanced Micro Devices, Inc. [AMD/ATI] Navi 21 HDMI Audio [Radeon RX 6800/6800 XT / 6900 XT] [1002:ab28]
 9IOMMU Group 2:
10	00:02.0 Display controller [0380]: Intel Corporation CoffeeLake-S GT2 [UHD Graphics 630] [8086:3e98] (rev 02)
11IOMMU Group 3:
12	00:08.0 System peripheral [0880]: Intel Corporation Xeon E3-1200 v5/v6 / E3-1500 v5 / 6th/7th/8th Gen Core Processor Gaussian Mixture Model [8086:1911]
13IOMMU Group 4:
14	00:12.0 Signal processing controller [1180]: Intel Corporation Cannon Lake PCH Thermal Controller [8086:a379] (rev 10)
15IOMMU Group 5:
16	00:14.0 USB controller [0c03]: Intel Corporation Cannon Lake PCH USB 3.1 xHCI Host Controller [8086:a36d] (rev 10)
17	00:14.2 RAM memory [0500]: Intel Corporation Cannon Lake PCH Shared SRAM [8086:a36f] (rev 10)
18IOMMU Group 6:
19	00:16.0 Communication controller [0780]: Intel Corporation Cannon Lake PCH HECI Controller [8086:a360] (rev 10)
20IOMMU Group 7:
21	00:17.0 SATA controller [0106]: Intel Corporation Cannon Lake PCH SATA AHCI Controller [8086:a352] (rev 10)
22IOMMU Group 8:
23	00:1b.0 PCI bridge [0604]: Intel Corporation Cannon Lake PCH PCI Express Root Port #17 [8086:a340] (rev f0)
24IOMMU Group 9:
25	00:1b.4 PCI bridge [0604]: Intel Corporation Cannon Lake PCH PCI Express Root Port #21 [8086:a32c] (rev f0)
26IOMMU Group 10:
27	00:1c.0 PCI bridge [0604]: Intel Corporation Cannon Lake PCH PCI Express Root Port #1 [8086:a338] (rev f0)
28IOMMU Group 11:
29	00:1c.2 PCI bridge [0604]: Intel Corporation Cannon Lake PCH PCI Express Root Port #3 [8086:a33a] (rev f0)
30IOMMU Group 12:
31	00:1f.0 ISA bridge [0601]: Intel Corporation Z390 Chipset LPC/eSPI Controller [8086:a305] (rev 10)
32	00:1f.3 Audio device [0403]: Intel Corporation Cannon Lake PCH cAVS [8086:a348] (rev 10)
33	00:1f.4 SMBus [0c05]: Intel Corporation Cannon Lake PCH SMBus Controller [8086:a323] (rev 10)
34	00:1f.5 Serial bus controller [0c80]: Intel Corporation Cannon Lake PCH SPI Controller [8086:a324] (rev 10)
35	00:1f.6 Ethernet controller [0200]: Intel Corporation Ethernet Connection (7) I219-V [8086:15bc] (rev 10)
36IOMMU Group 13:
37	04:00.0 Non-Volatile memory controller [0108]: Sandisk Corp WD Black SN750 / PC SN730 NVMe SSD [15b7:5006]
38IOMMU Group 14:
39	05:00.0 VGA compatible controller [0300]: NVIDIA Corporation GP104GL [Quadro P4000] [10de:1bb1] (rev a1)
40	05:00.1 Audio device [0403]: NVIDIA Corporation GP104 High Definition Audio Controller [10de:10f0] (rev a1)
41IOMMU Group 15:
42	07:00.0 USB controller [0c03]: Renesas Technology Corp. uPD720201 USB 3.0 Host Controller [1912:0014] (rev 03)
Install Looking Glass
The Looking Glass client does not have binaries provided by the project, so you’ll have to build them yourself, but don’t worry; it’s simple, and we have already installed all the dependencies. You can download the latest source code archive from here and extract it or use the commands below.
1wget --content-disposition https://looking-glass.io/artifact/stable/source
2tar -xf looking-glass-B6.tar.gz
You’ll navigate to the source directory, create a build directory to make the client, build it, and install it.
 1# Navigate to the source directory
 2cd looking-glass-B6
 3
 4# Create a directory to build the client
 5mkdir client/build
 6
 7# Navigate to the build directory
 8cd client/build
 9
10# Use CMake to configure the build
11cmake ../ -DENABLE_LIBDECOR=ON
12
13# Compile the code
14make -j8
15
16# Install the build
17sudo make install
You can launch Looking Glass from the terminal. However, you may prefer a graphical launcher; copy the icon from the source directory and create some launchers for the virtual machine.
 1# Make sure pixmaps directory exists
 2sudo mkdir -p /usr/local/share/pixmaps/
 3
 4# Make sure applications directory exists
 5sudo mkdir -p /usr/local/share/applications/
 6
 7# Copy the icon from the source directory to pixmaps
 8sudo cp ../../resources/icon-128x128.png /usr/local/share/pixmaps/looking-glass-client.png
 9
10# Create fullscreen launcher
11cat <<EOF | sudo dd status=none of="/usr/local/share/applications/looking-glass-fullscreen.desktop"
12[Desktop Entry]
13Comment=
14Exec=/usr/local/bin/looking-glass-client -F egl:doubleBuffer=no
15GenericName=Use The Looking Glass Client to Connect to Windows in Fullscreen Mode
16Icon=/usr/local/share/pixmaps/looking-glass-client.png
17Name=Looking Glass Windows (Fullscreen)
18NoDisplay=false
19Path=
20StartupNotify=true
21Terminal=false
22TerminalOptions=
23Type=Application
24Categories=Utility;
25X-KDE-SubstituteUID=false
26X-KDE-Username=
27EOF
28
29# Create windowed launcher
30cat <<EOF | sudo dd status=none of="/usr/local/share/applications/looking-glass-windowed.desktop"
31[Desktop Entry]
32Comment=
33Exec=/usr/local/bin/looking-glass-client -T egl:doubleBuffer=no
34GenericName=Use The Looking Glass Client to Connect to Windows in Windowed Mode
35Icon=/usr/local/share/pixmaps/looking-glass-client.png
36Name=Looking Glass Windows (Windowed)
37NoDisplay=false
38Path=
39StartupNotify=true
40Terminal=false
41TerminalOptions=
42Type=Application
43Categories=Utility;
44X-KDE-SubstituteUID=false
45X-KDE-Username=
46EOF
Create the shared memory file for the Looking Glass host and client to read and write.
1cat <<EOF | sudo dd status=none of="/etc/tmpfiles.d/10-looking-glass.conf"
2# Type Path               Mode UID  GID Age Argument
3f /dev/shm/looking-glass 0660 libvirt-qemu libvirt -
4EOF
Edit the /etc/systemd/logind.conf file and ensure you have RemoveIPC=no; this will keep the shared memory file from being deleted randomly.
1sudo nano /etc/systemd/logind.conf
your /etc/systemd/logind.conf should look like the following.
 1[Login]
 2#NAutoVTs=6
 3#ReserveVT=6
 4#KillUserProcesses=no
 5#KillOnlyUsers=
 6#KillExcludeUsers=root
 7#InhibitDelayMaxSec=5
 8#UserStopDelaySec=10
 9#HandlePowerKey=poweroff
10#HandleSuspendKey=suspend
11#HandleHibernateKey=hibernate
12#HandleLidSwitch=suspend
13#HandleLidSwitchExternalPower=suspend
14#HandleLidSwitchDocked=ignore
15#HandleRebootKey=reboot
16#PowerKeyIgnoreInhibited=no
17#SuspendKeyIgnoreInhibited=no
18#HibernateKeyIgnoreInhibited=no
19#LidSwitchIgnoreInhibited=yes
20#RebootKeyIgnoreInhibited=no
21#HoldoffTimeoutSec=30s
22#IdleAction=ignore
23#IdleActionSec=30min
24#RuntimeDirectorySize=10%
25#RuntimeDirectoryInodesMax=400k
26RemoveIPC=no
27#InhibitorsMax=8192
28#SessionsMax=8192
Create the temporary memory file.
1sudo systemd-tmpfiles --create
Create the Virtual Machine
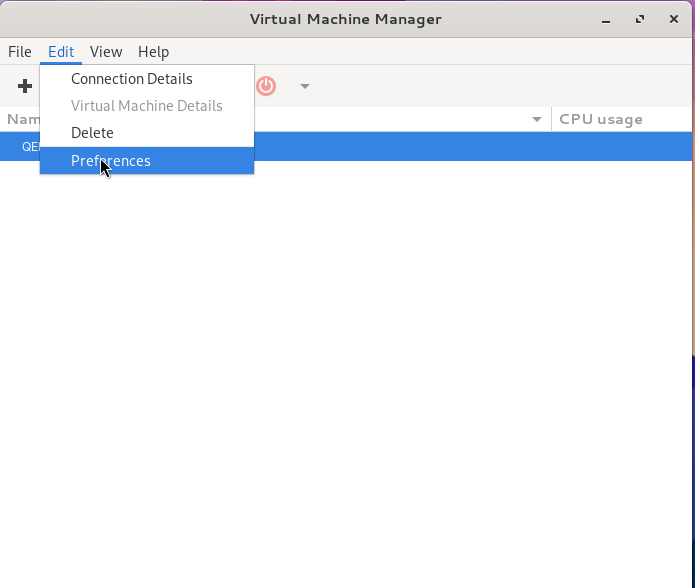
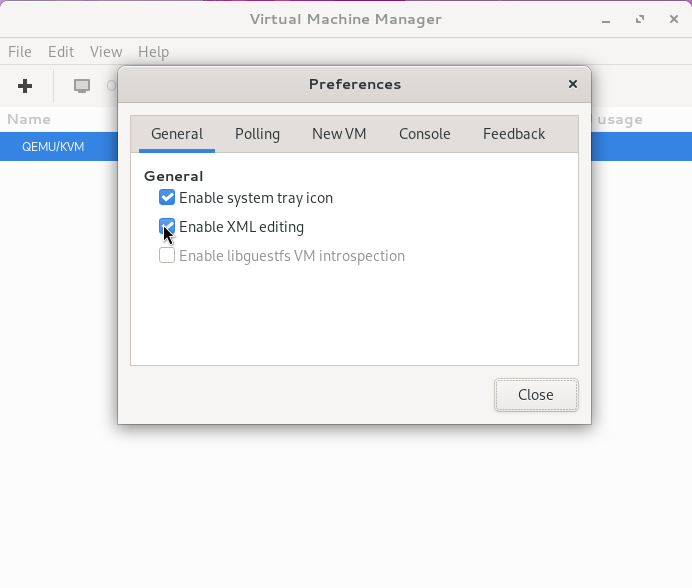
Open virt-manager from your menu, click Edit->Preferences, then under General, checkmark Enable XML editing and click Close.
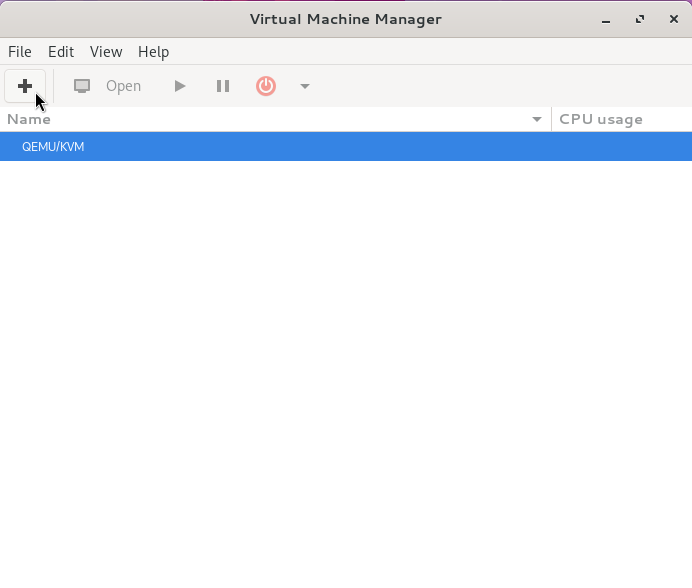
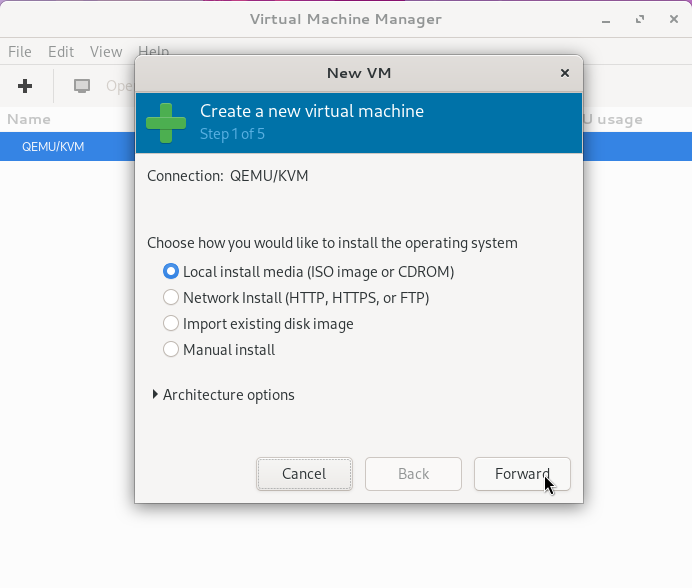
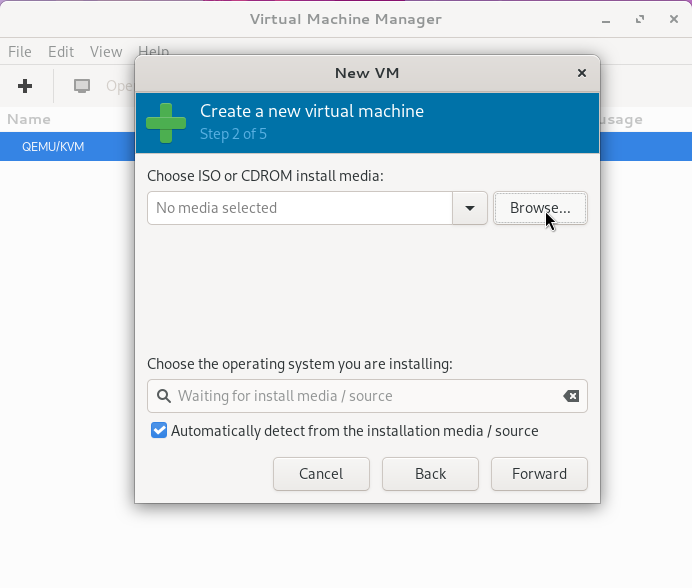
Click the plus button, select Local install media (ISO images or CDROM), then click Forward.
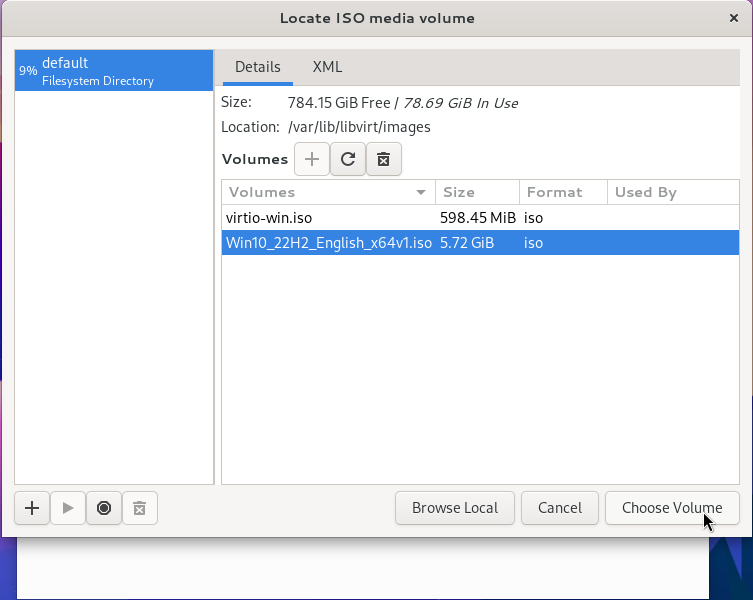
Click Browse and then select the ISO you downloaded earlier; if you don’t see it, you may have to push the refresh button for it to show up. After you select it, click Choose volume and then Forward to continue.
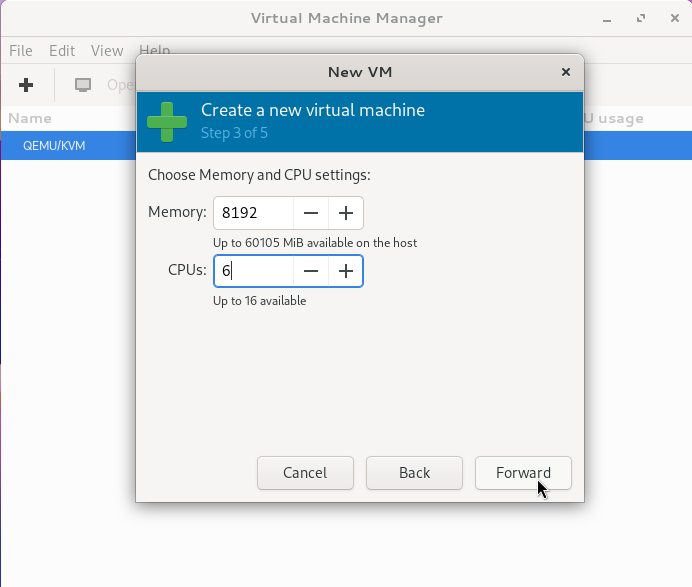
For memory, you’ll want at least 8 GIB (8192); for the CPUs, you’ll want at least 4, but 6 or more is preferred. After you make your selection, click Forward to continue.
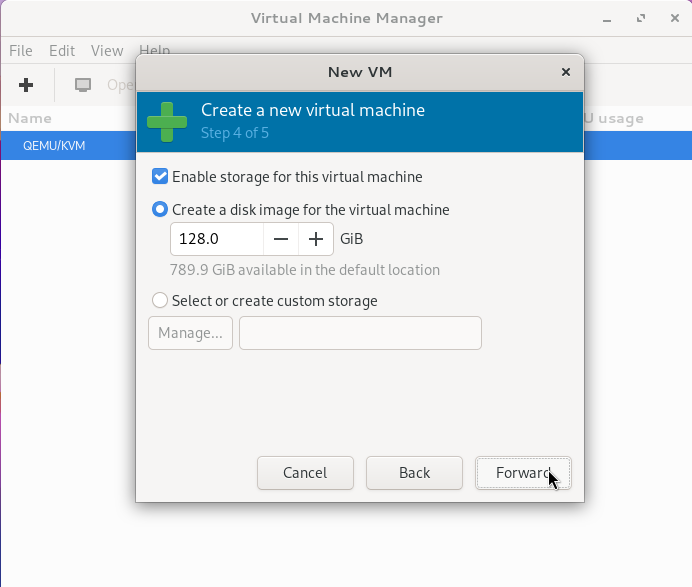
For Windows, you’ll need to give it at least 80 GiB; I generally give each virtual machine 128 GiB. After you make your selection, click Forward to continue.
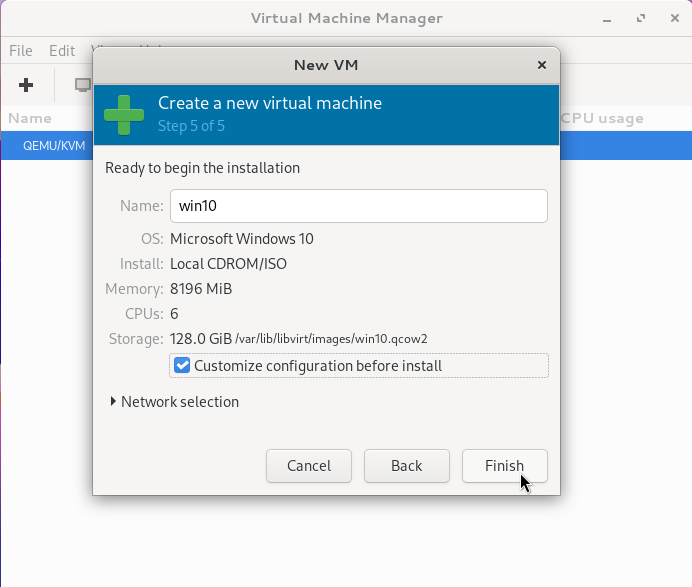
Set your virtual machine’s name, then checkmark Customize configuration before install and click Finish.
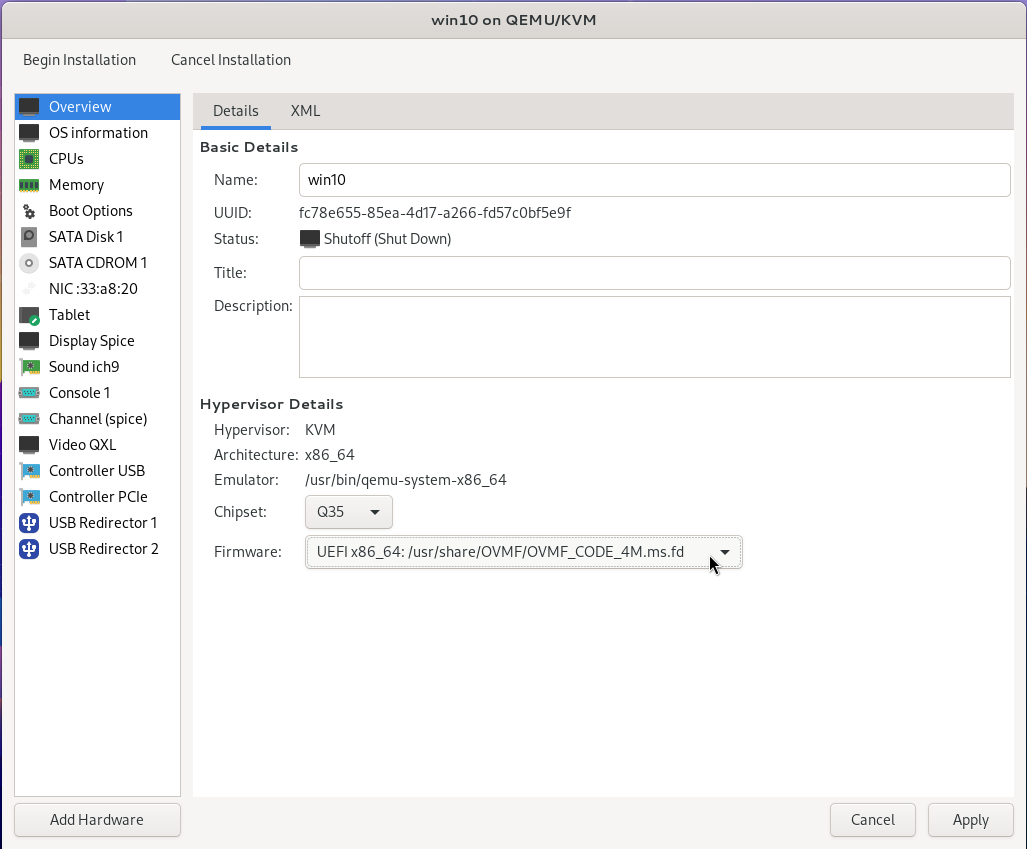
In the overview section, you’ll want to select UEFI x86_64: /usr/share/OVMF/OVMF_CODE_4M.ms.fd for the firmware. As you progress through the different sections, popups will ask you to apply your changes; click Yes each time.
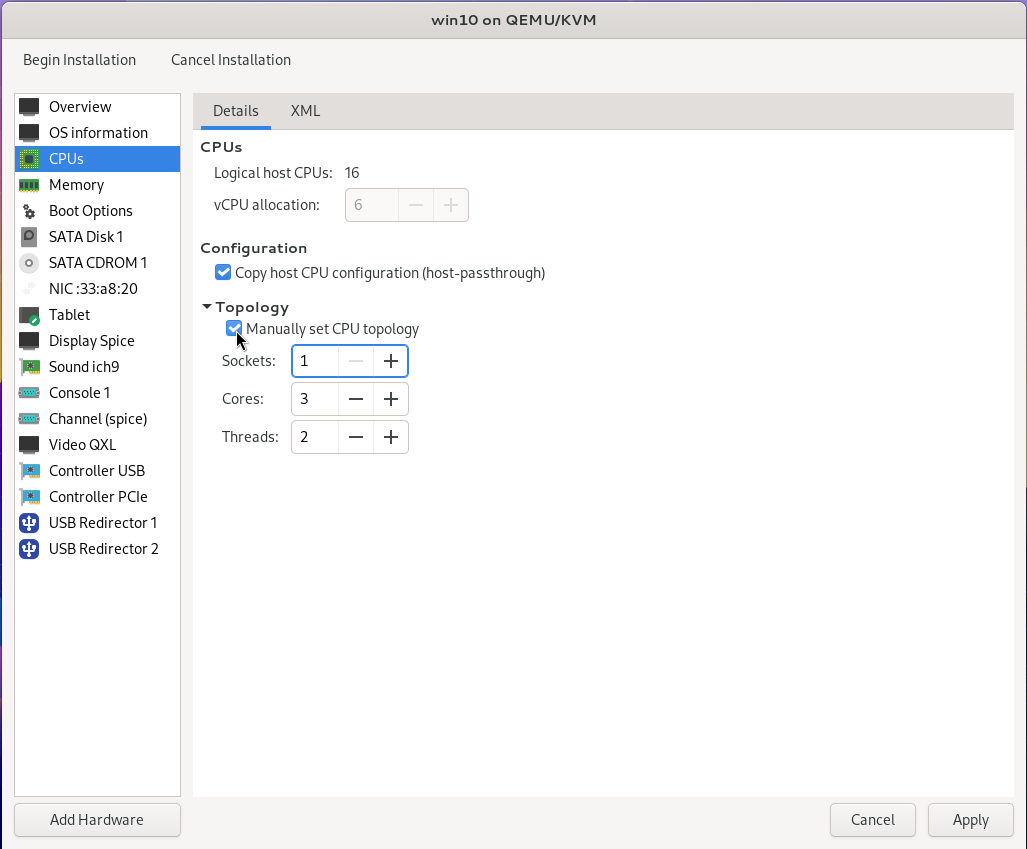
Under the CPUs section, checkmark Manually set CPU topology and set sockets to 1 and cores to the number you chose divided by 2. In this case, it’ll be 3, and finally, set threads to 2, giving the virtual machine a more common configuration.
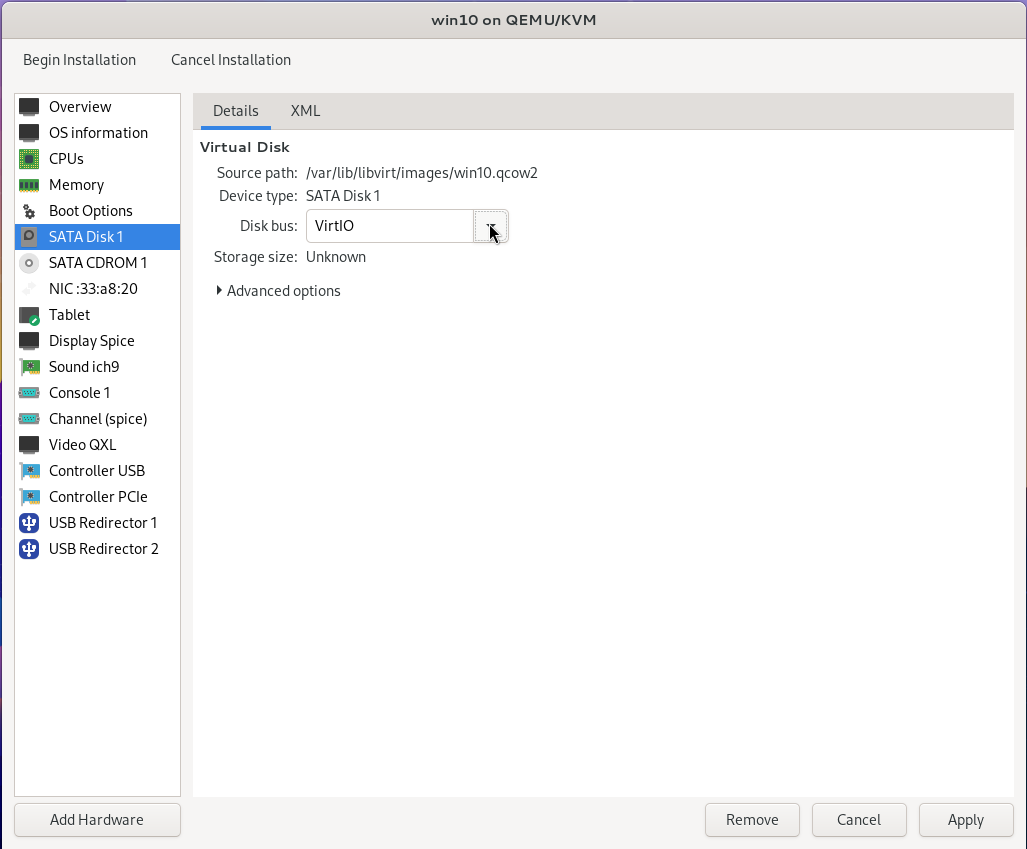
For SATA Disk 1, change the disk bus to VirtIO; note that’ll change it to VirtIO Disk 1.
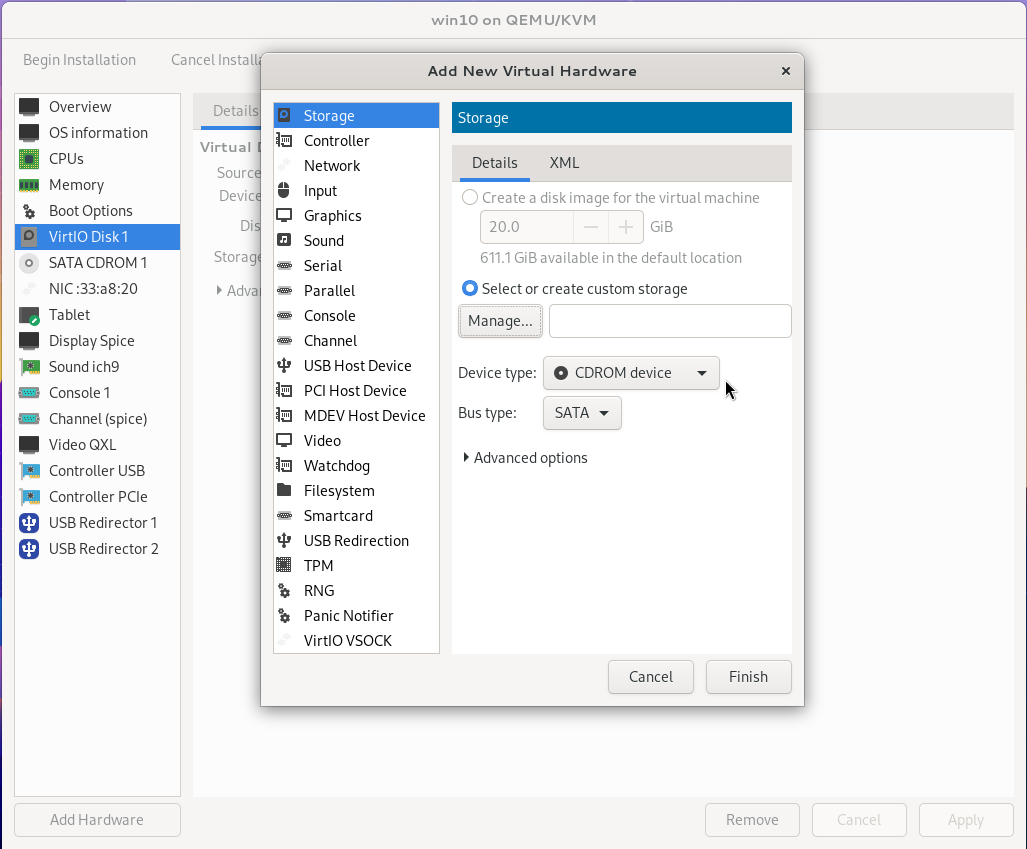
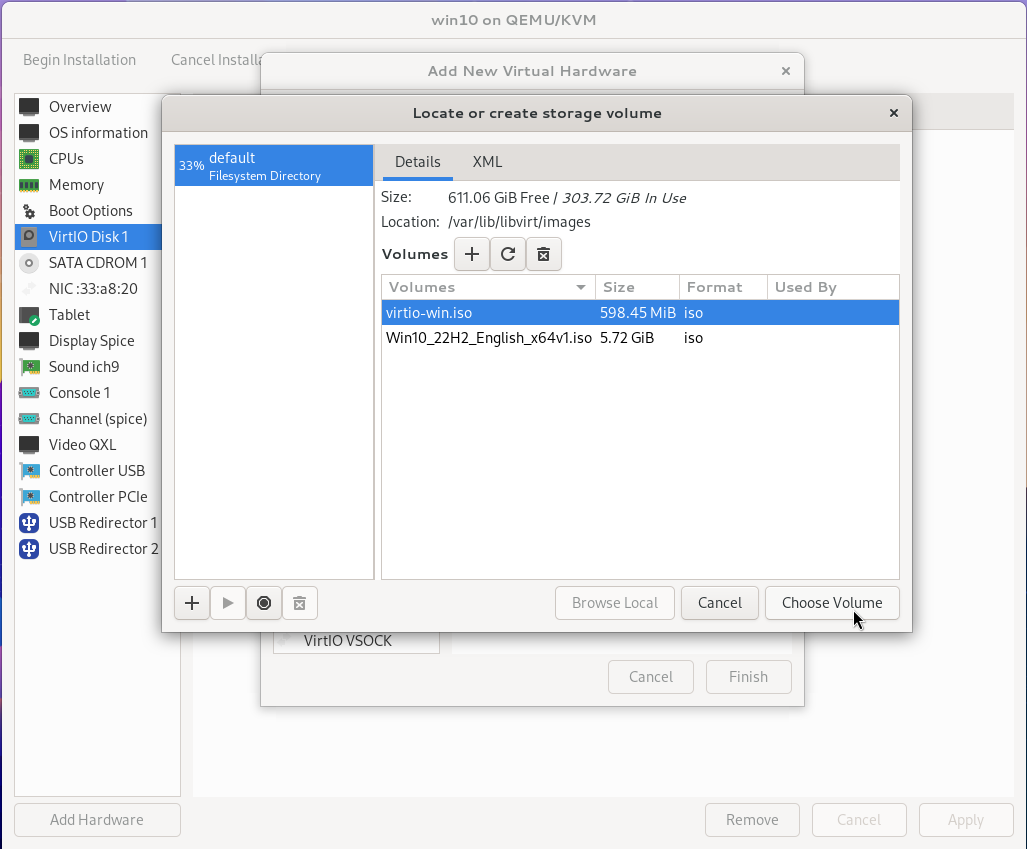
Click Add Hardware from the bottom of the sidebar, then click Storage and choose CDROM for the device type. Click Manage and select the virtio-win.iso downloaded earlier, then click Choose Volume and then click Finish.
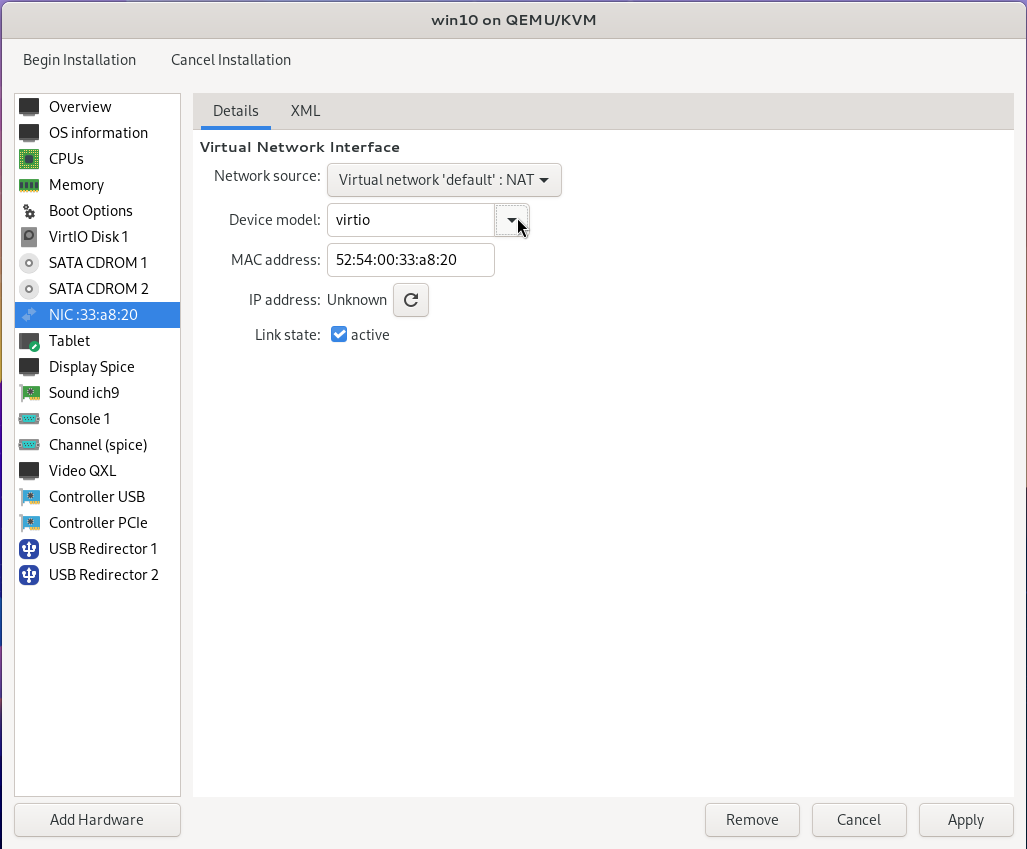
Click the NIC section and change the device model to virtio.
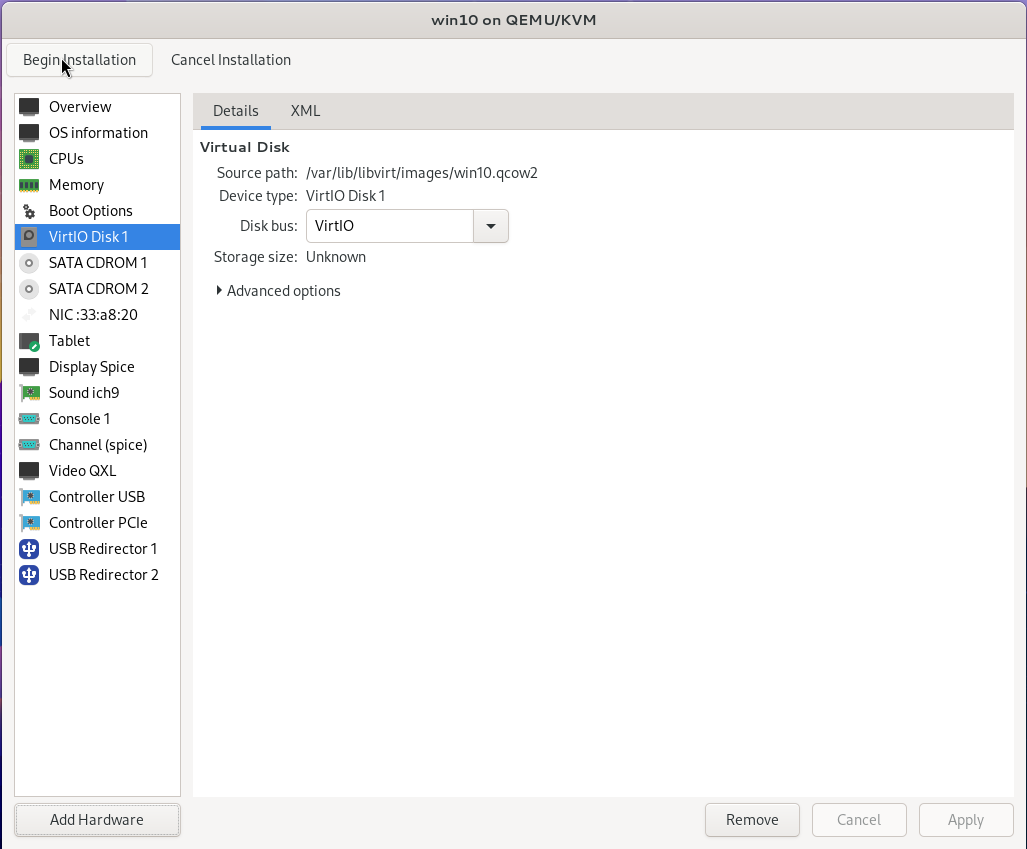
Finally, start the virtual machine up by clicking Begin installation.
Guest setup
Installing Windows
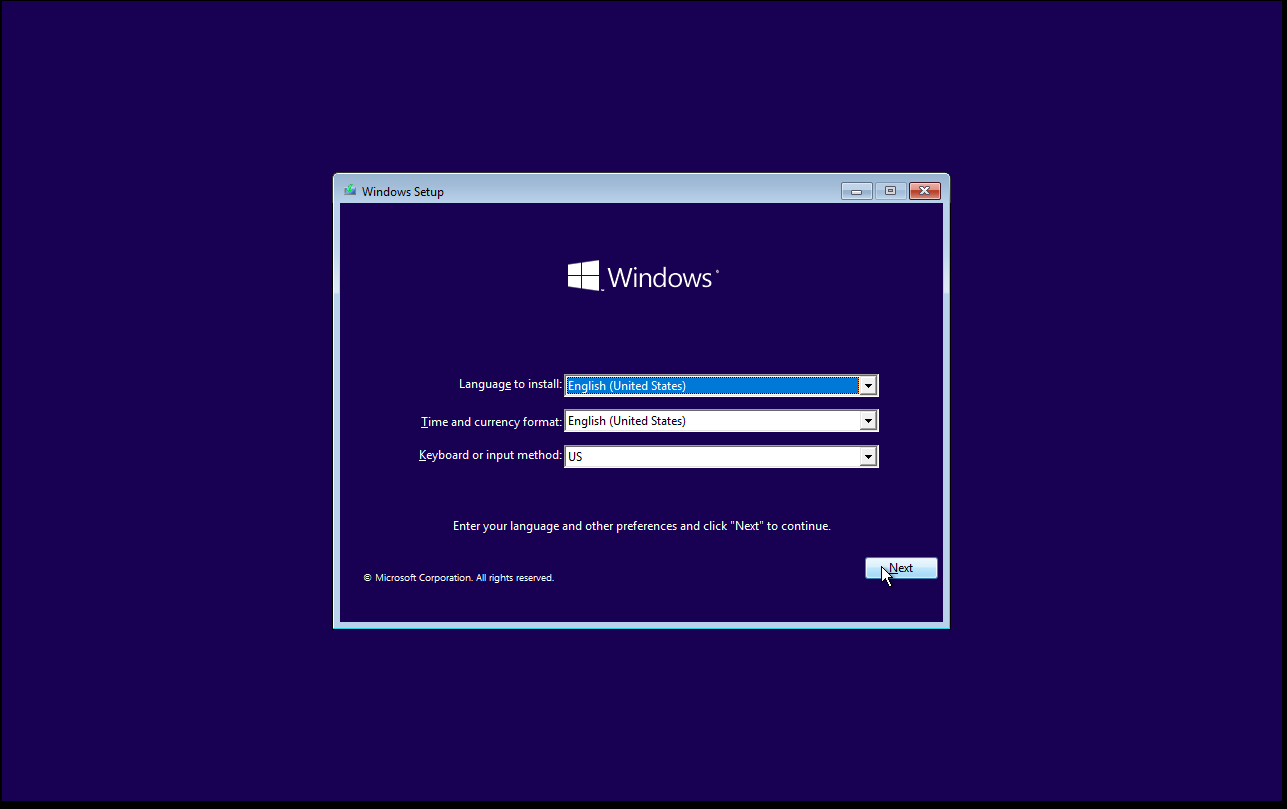
When the virtual machine starts booting off the CD, you may have to hit enter to get it to boot Windows. Once the installer is booted, select your region information and click Next.
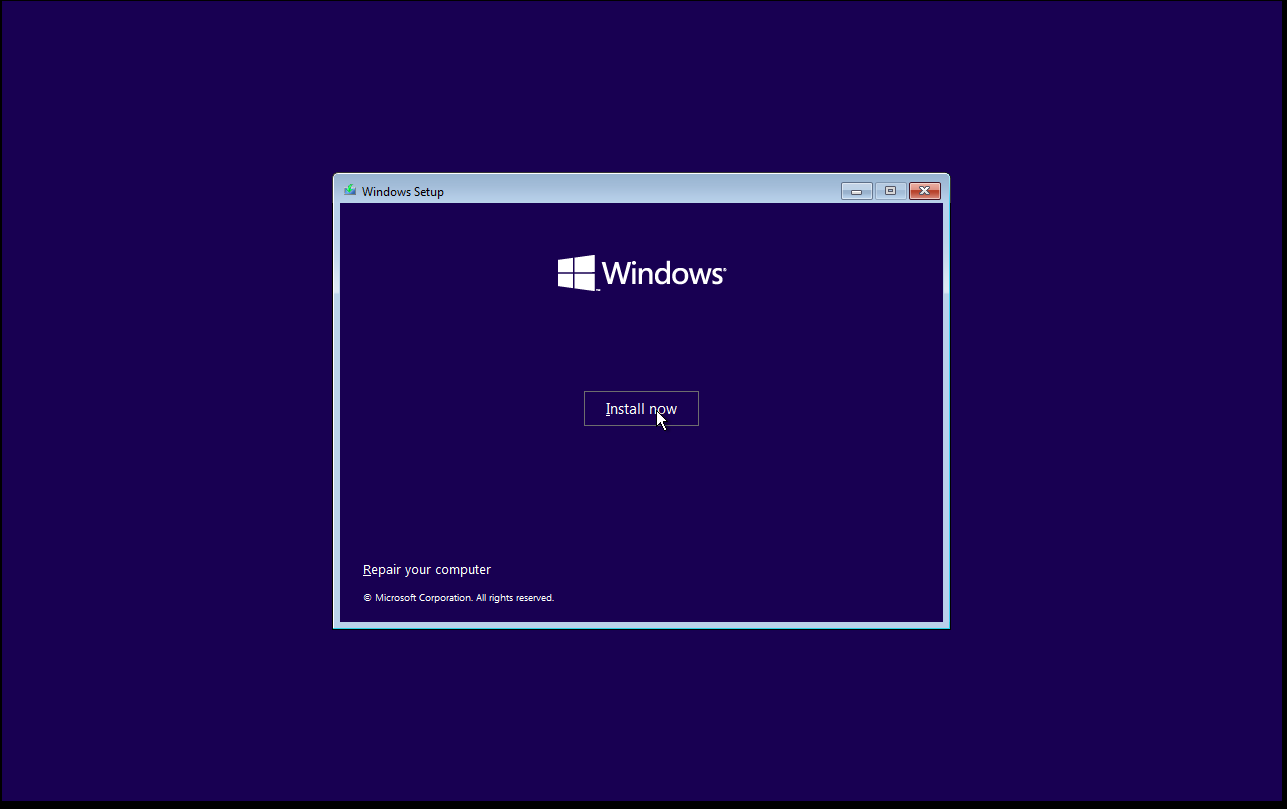
Click Install Now.
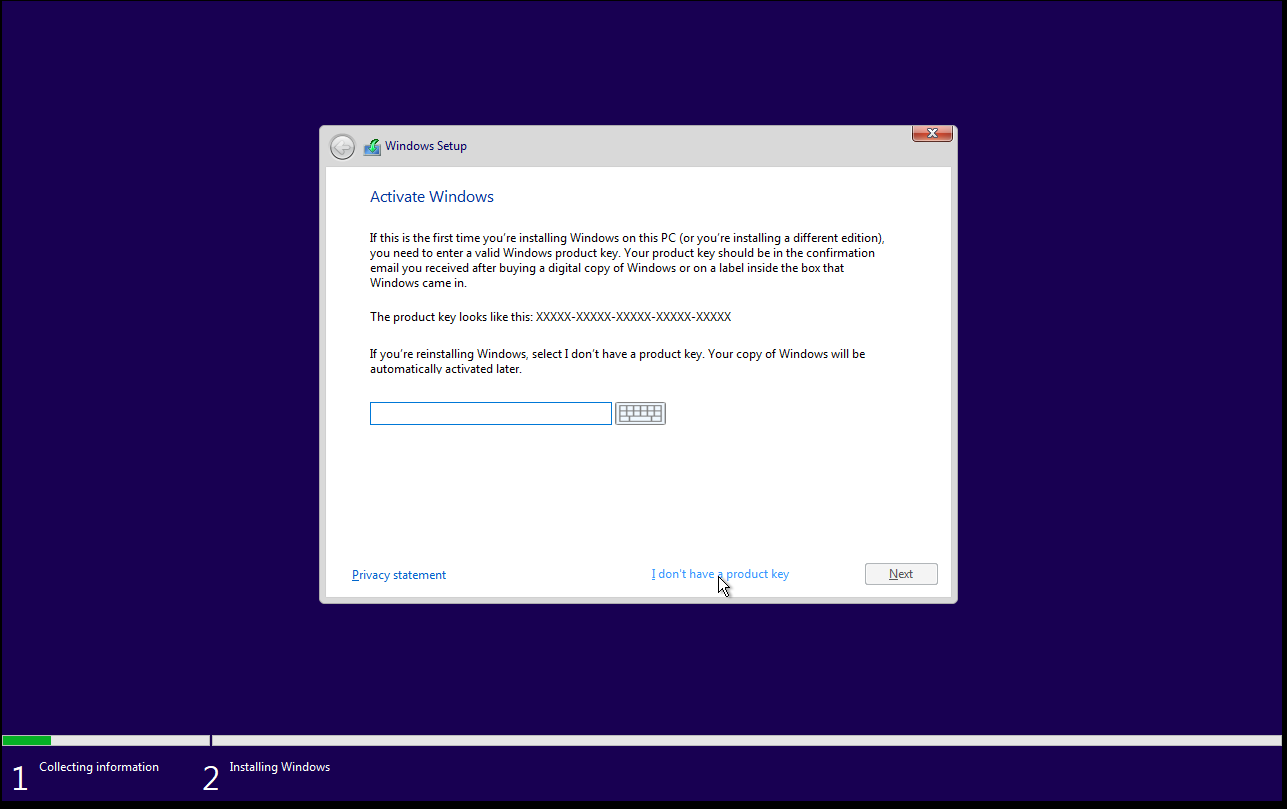
If you have a product key, enter it now, then click Next or choose I don't have a product key.
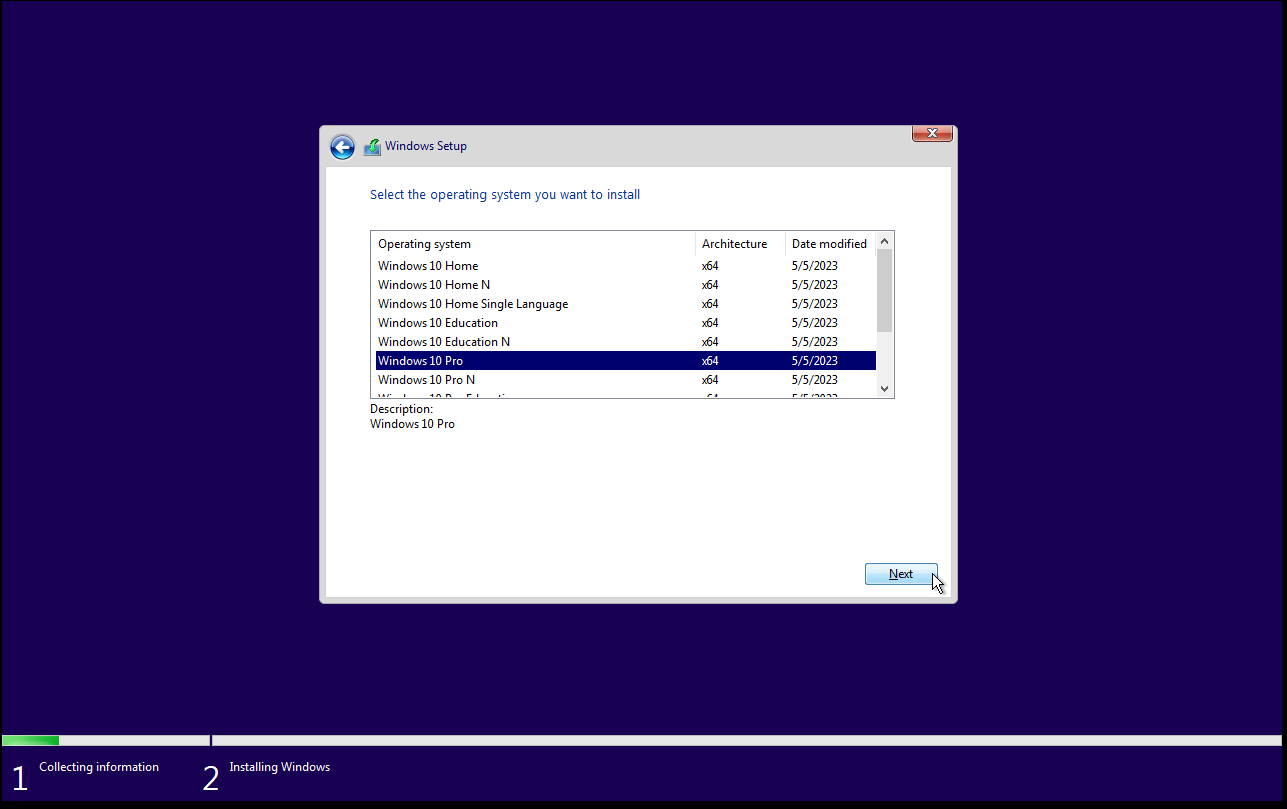
If you don’t have a product key, choose your Windows version to install; I suggest choosing Windows 10 Pro X64, then click Next.
Accept the agreement with Microsoft to give away your privacy and click Next.
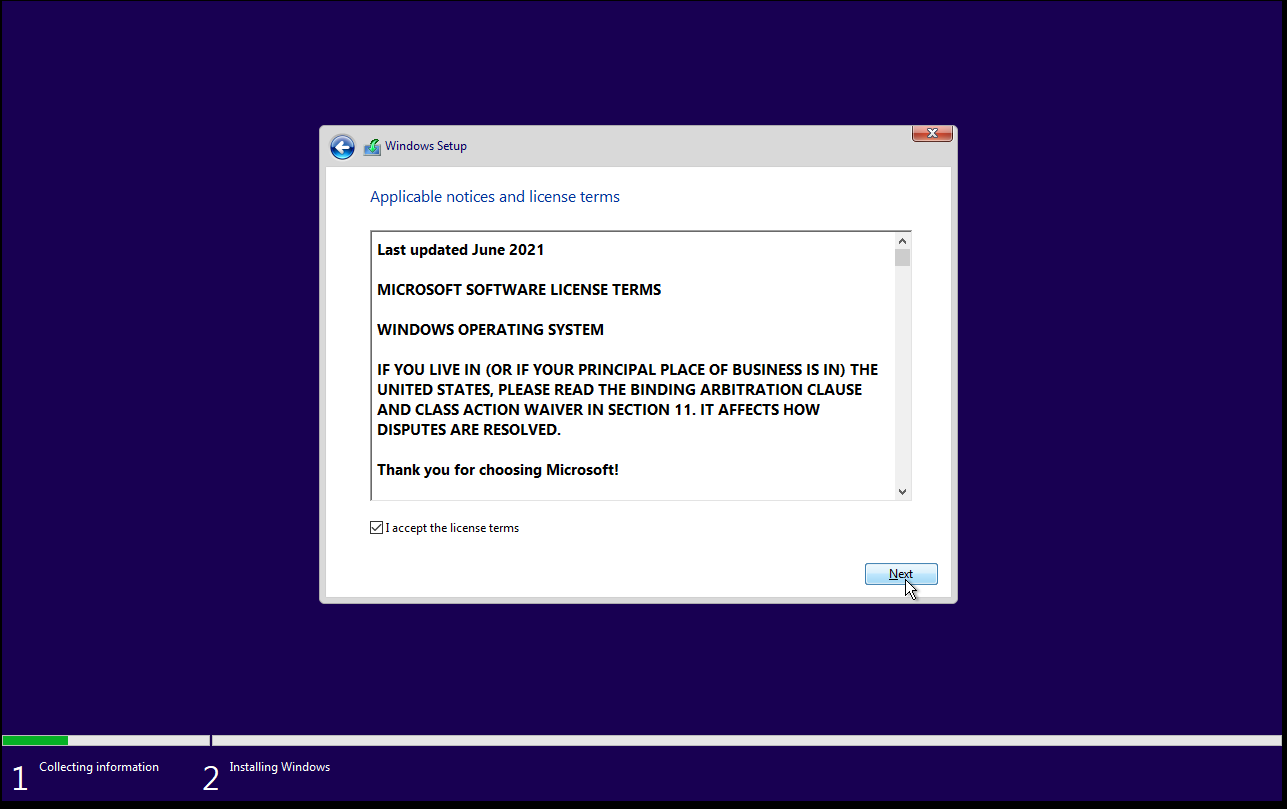
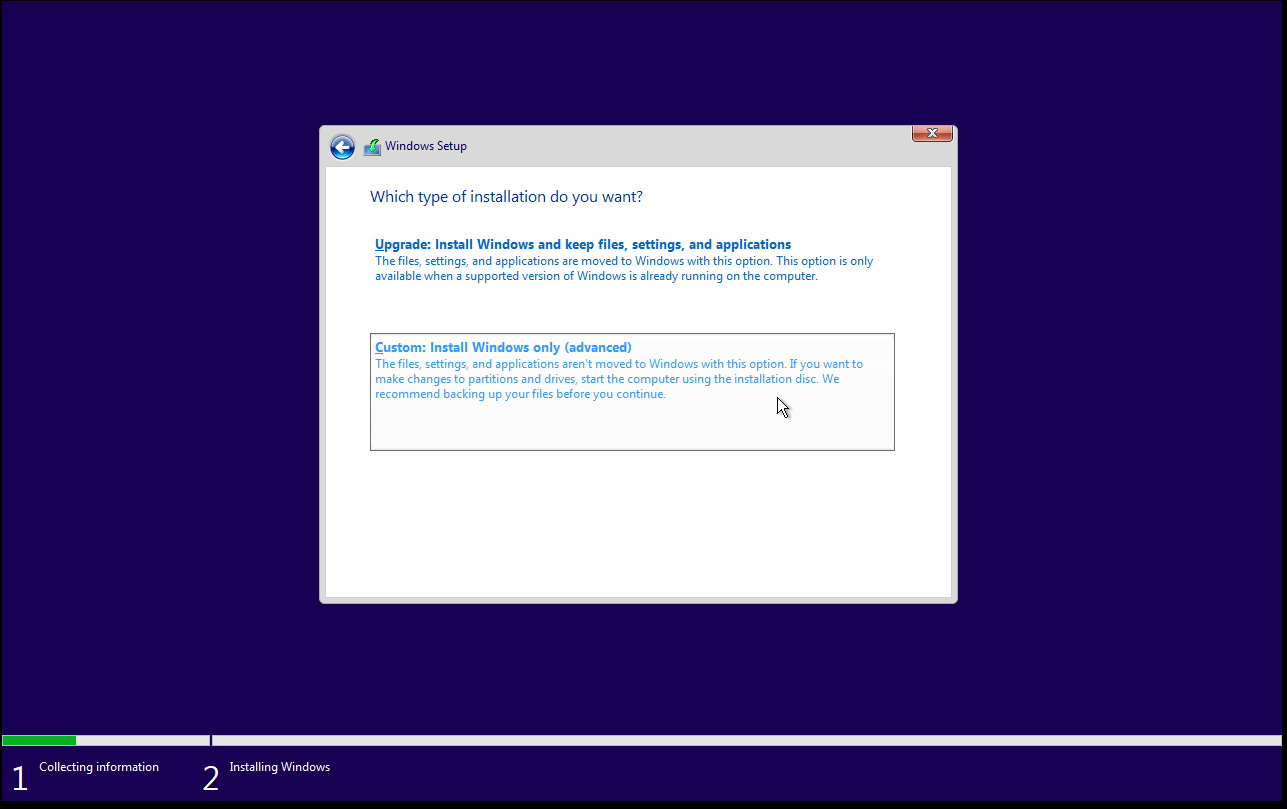
Select Custom: Install Windows only (advanced)
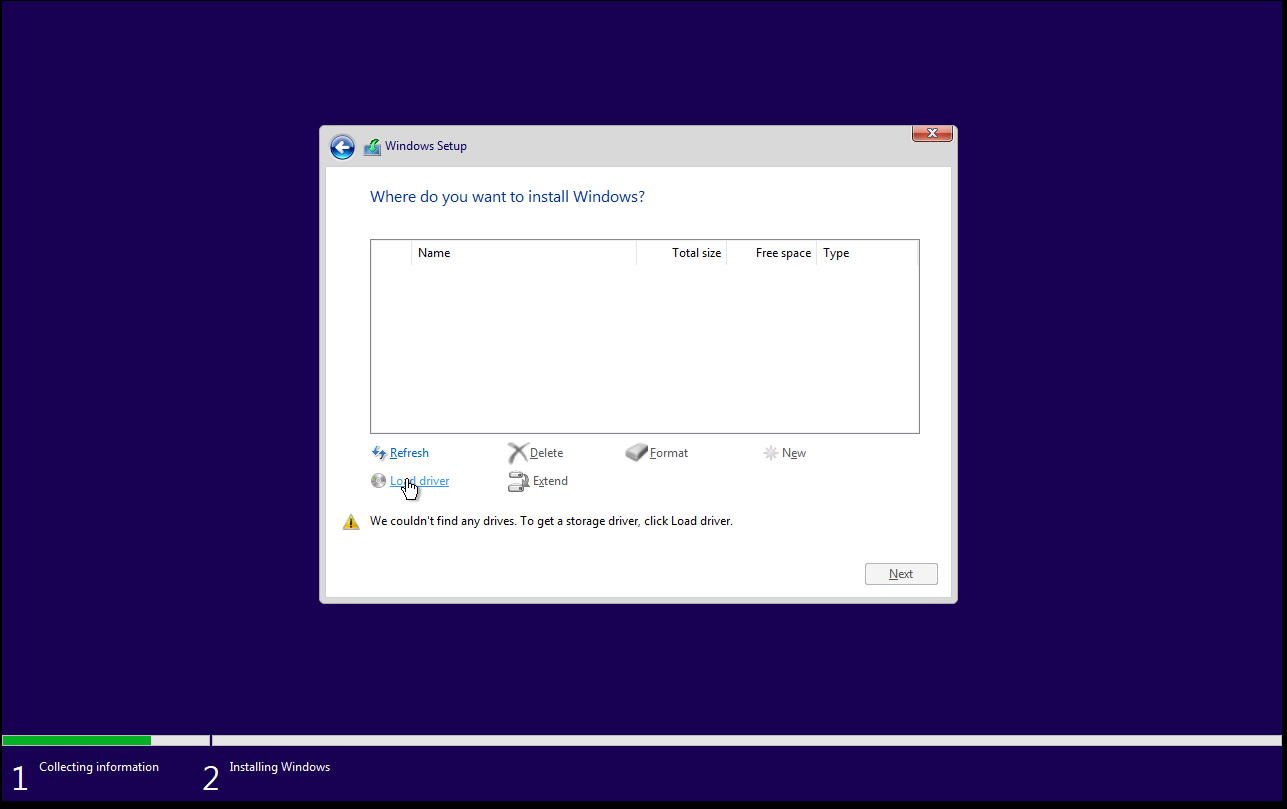
Click Load driver from the bottom of the dialog.
Click OK
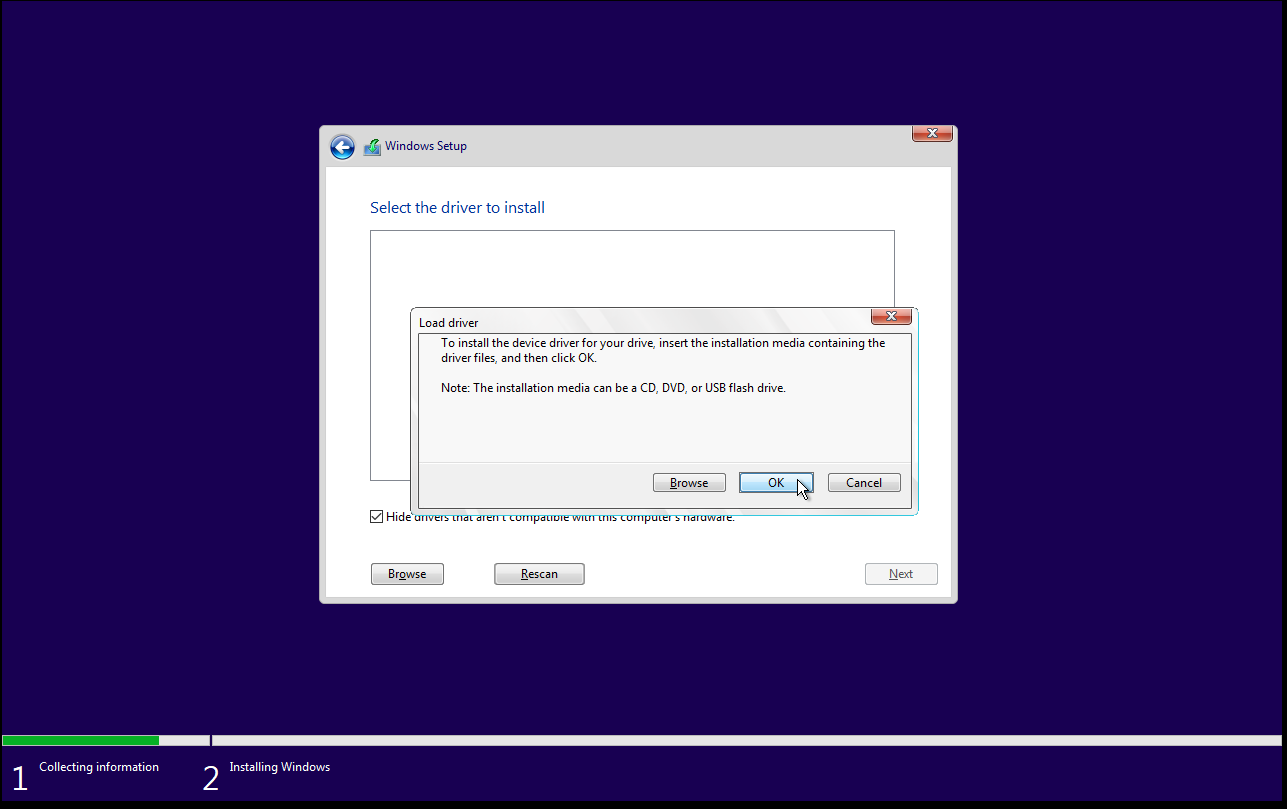
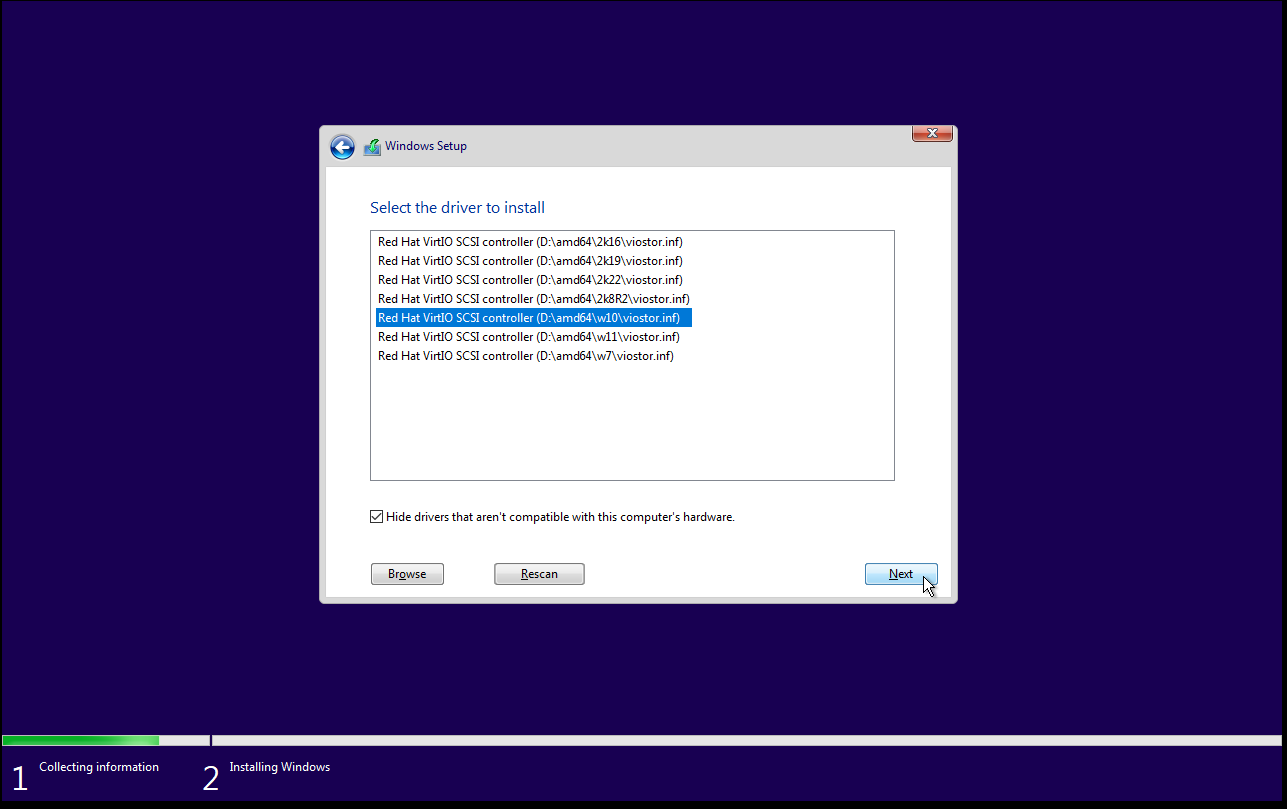
Select the driver for Windows 10 from the list and click Next.
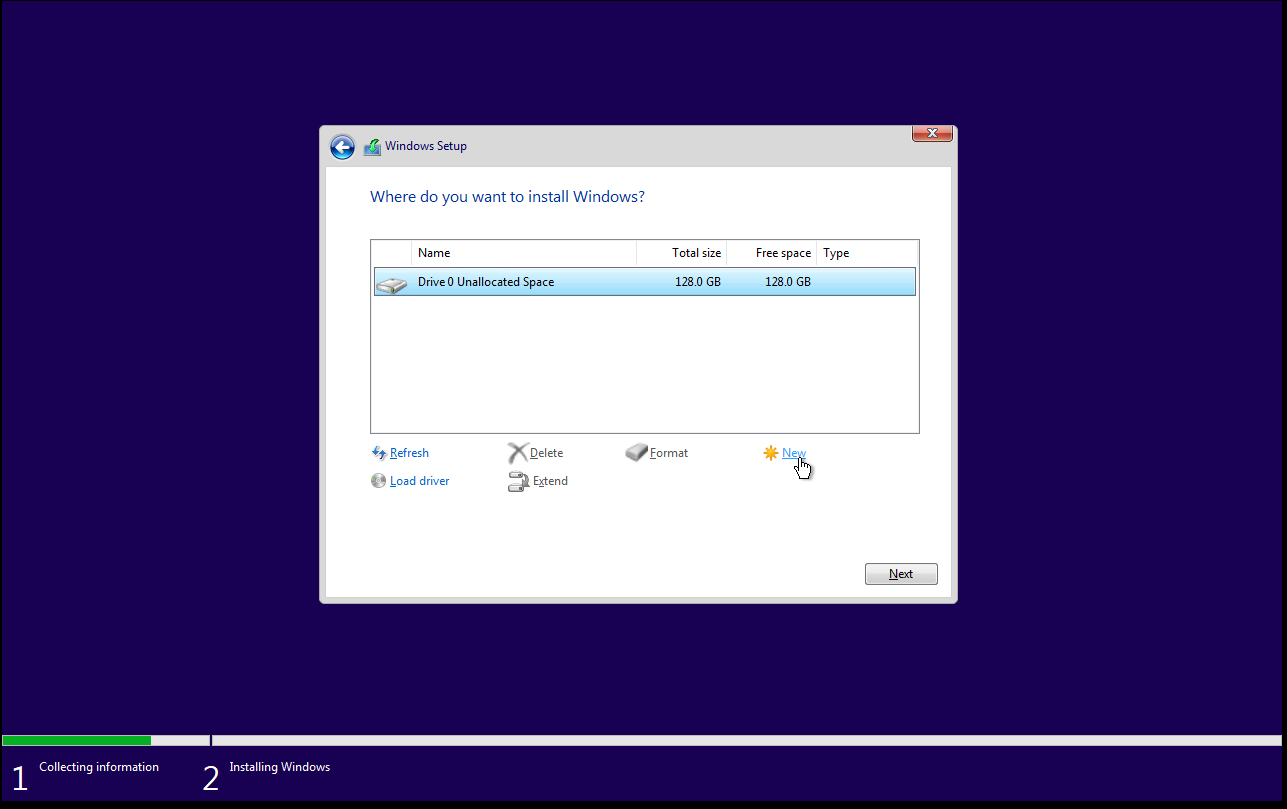
Click New
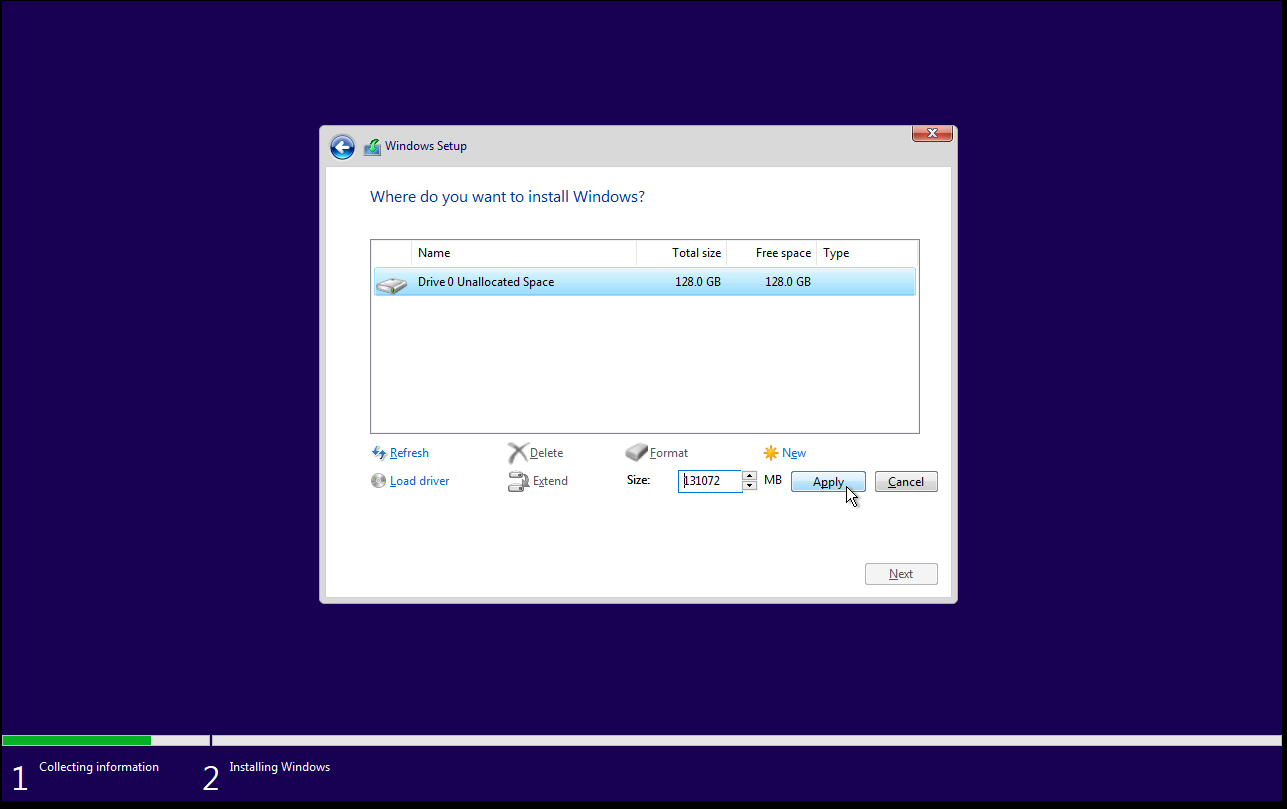
Click Apply
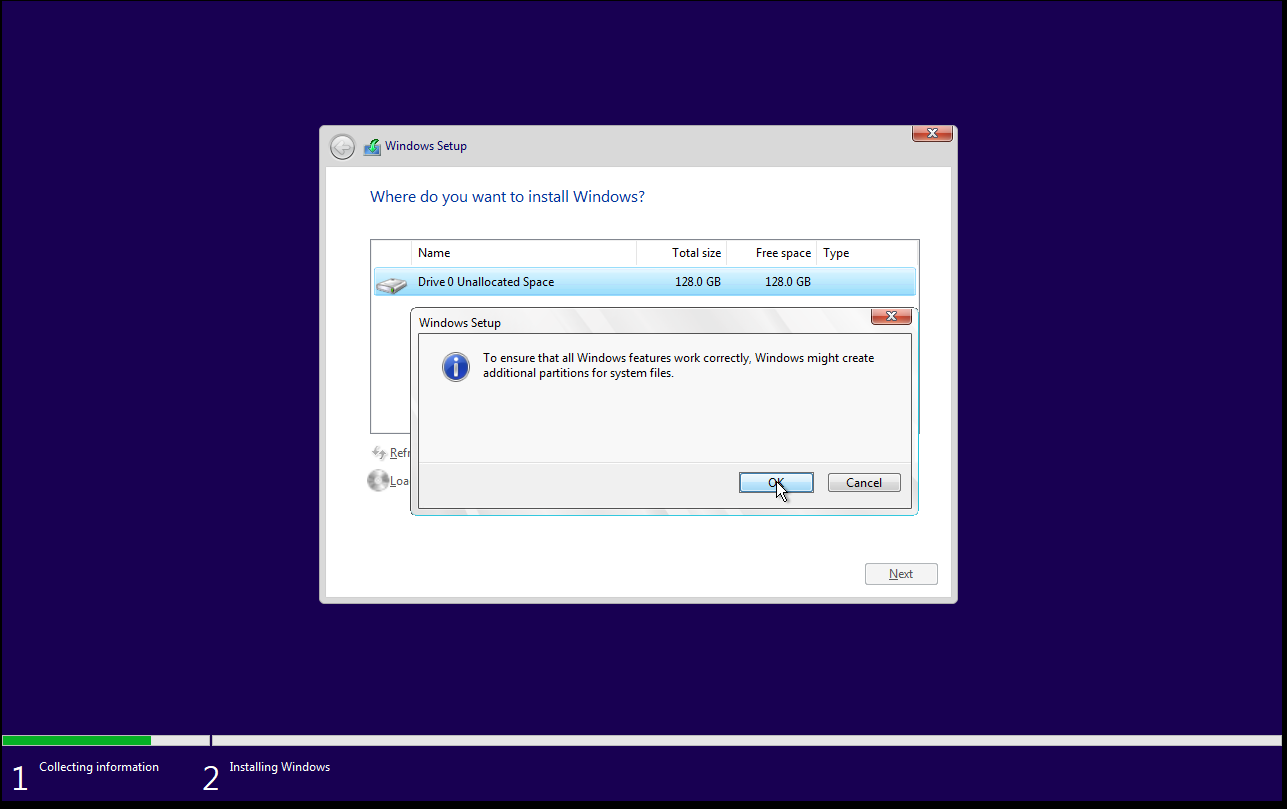
Windows will now tell you that it doesn’t care what you did, and it will do what it wants with the partition table for it to work; click OK.
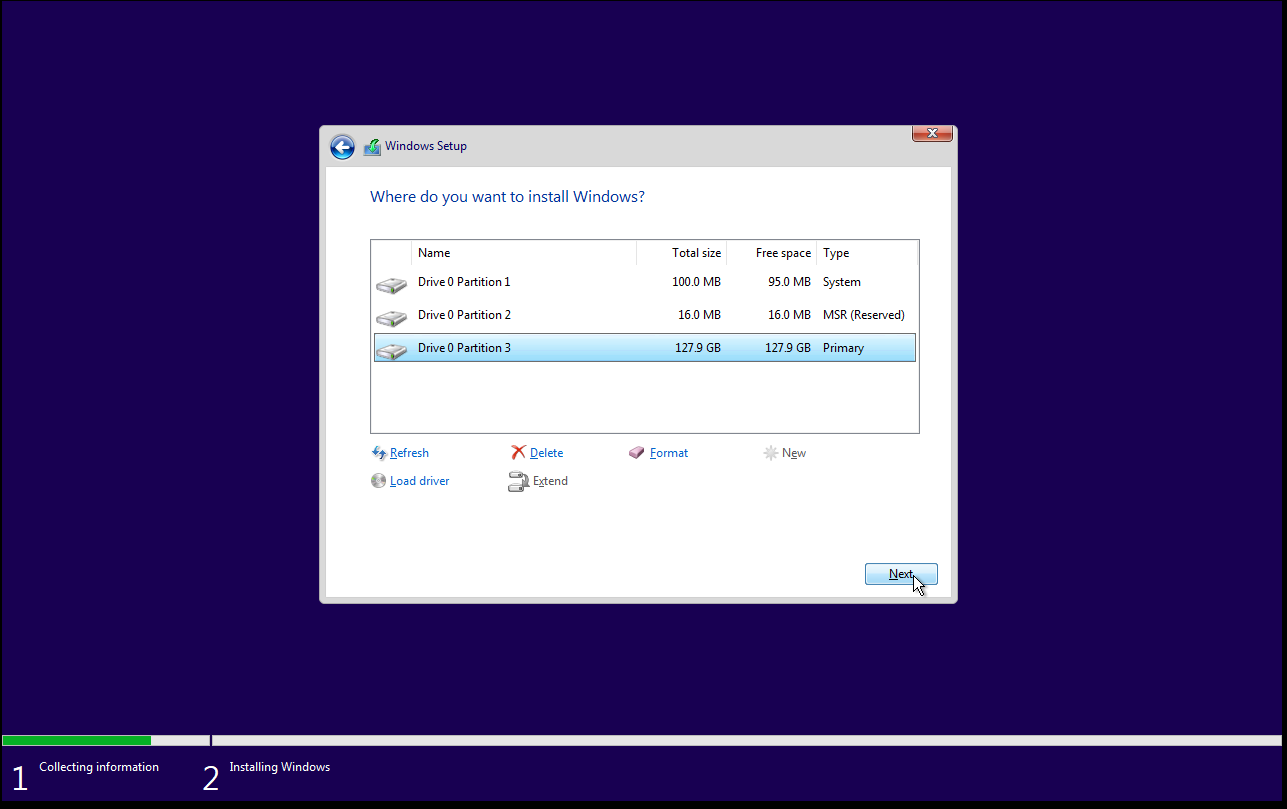
You should now see your new partition layout created by Windows; click Next to continue.
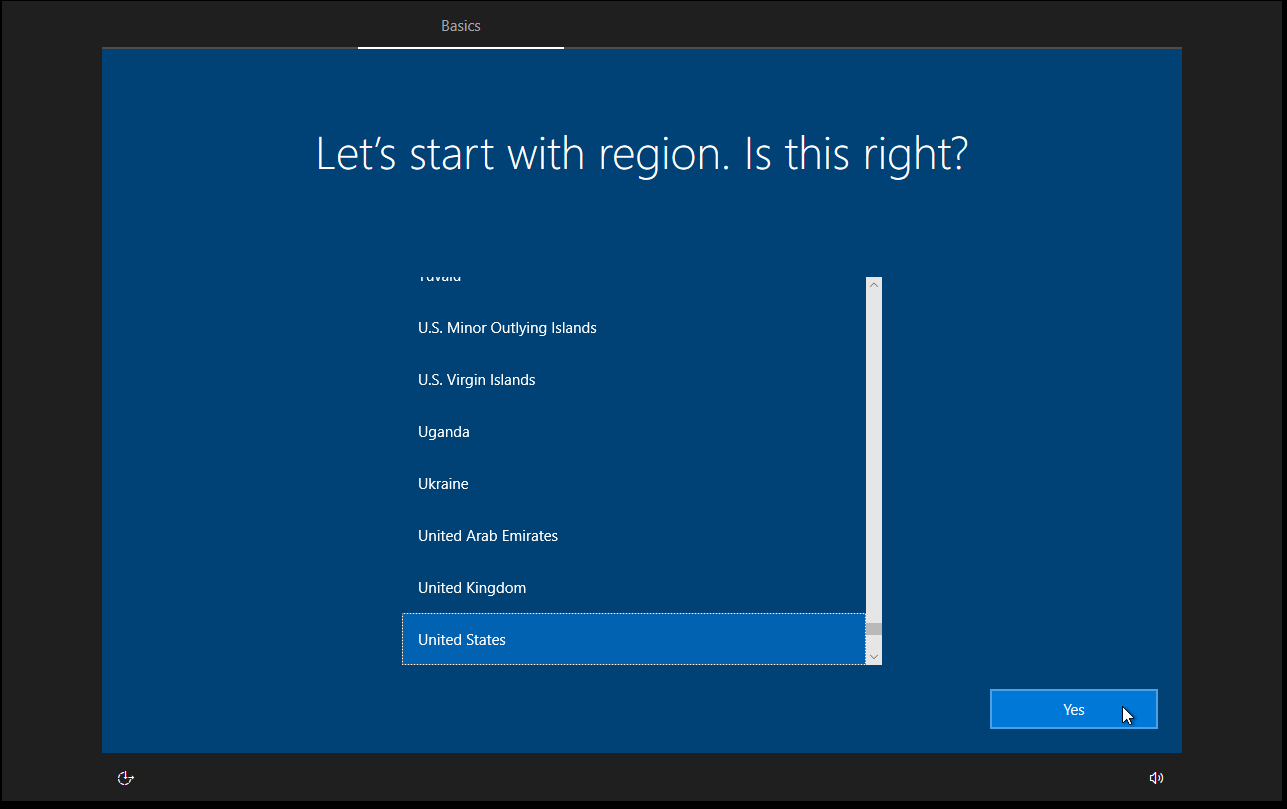
Confirm your region.
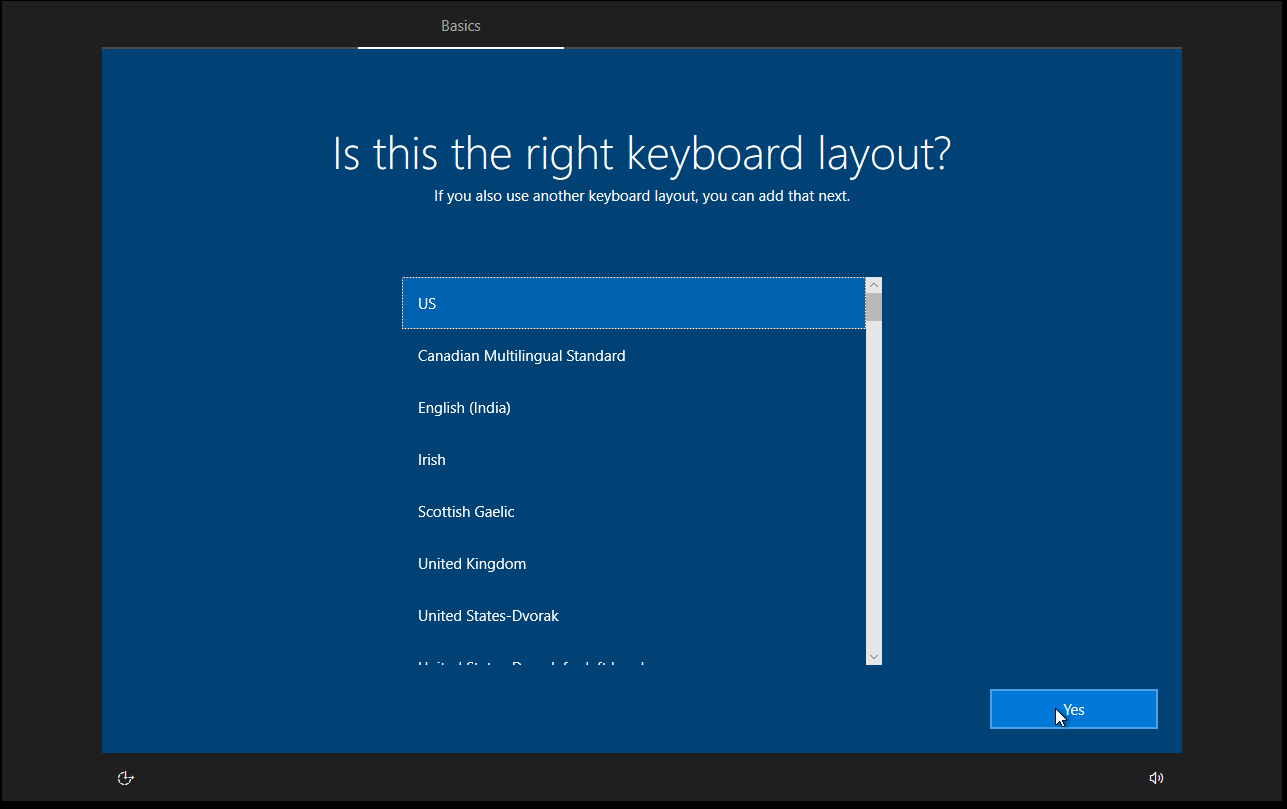
Confirm your layout.
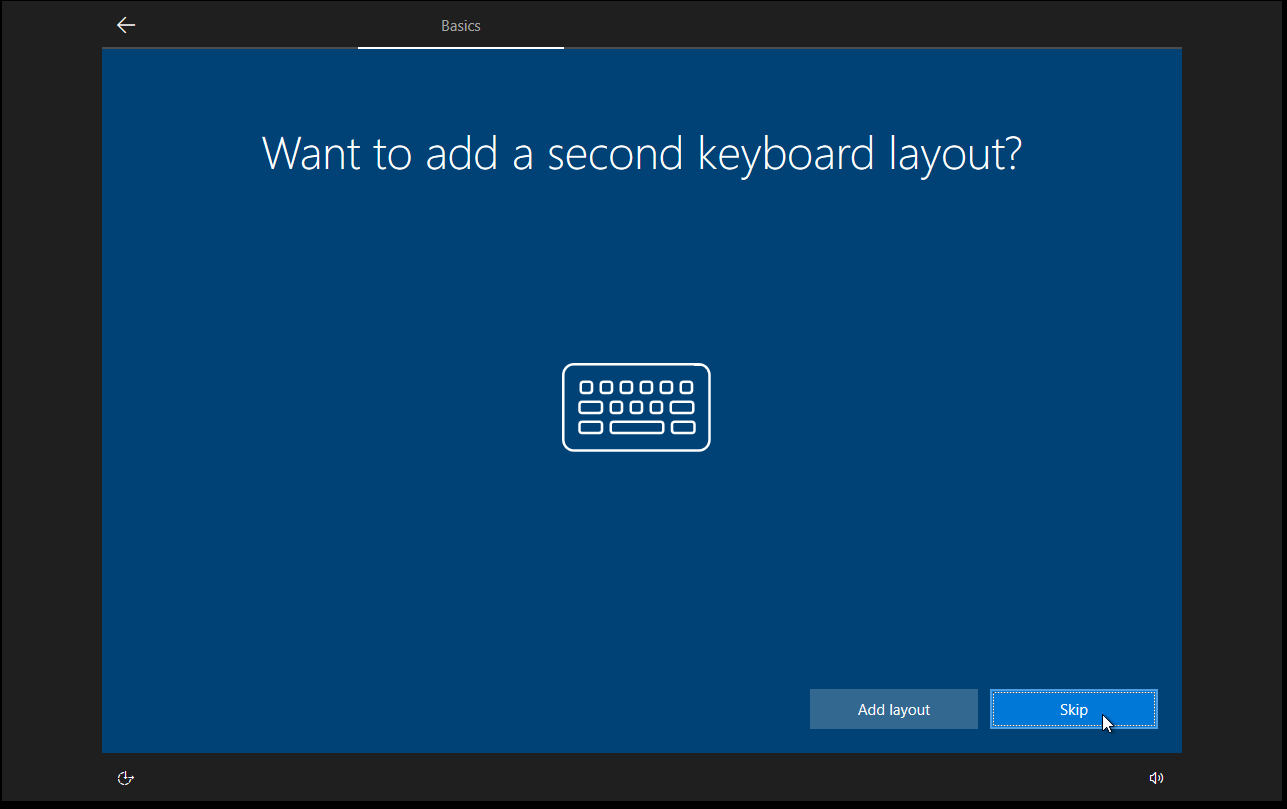
Add a second layout if wanted.
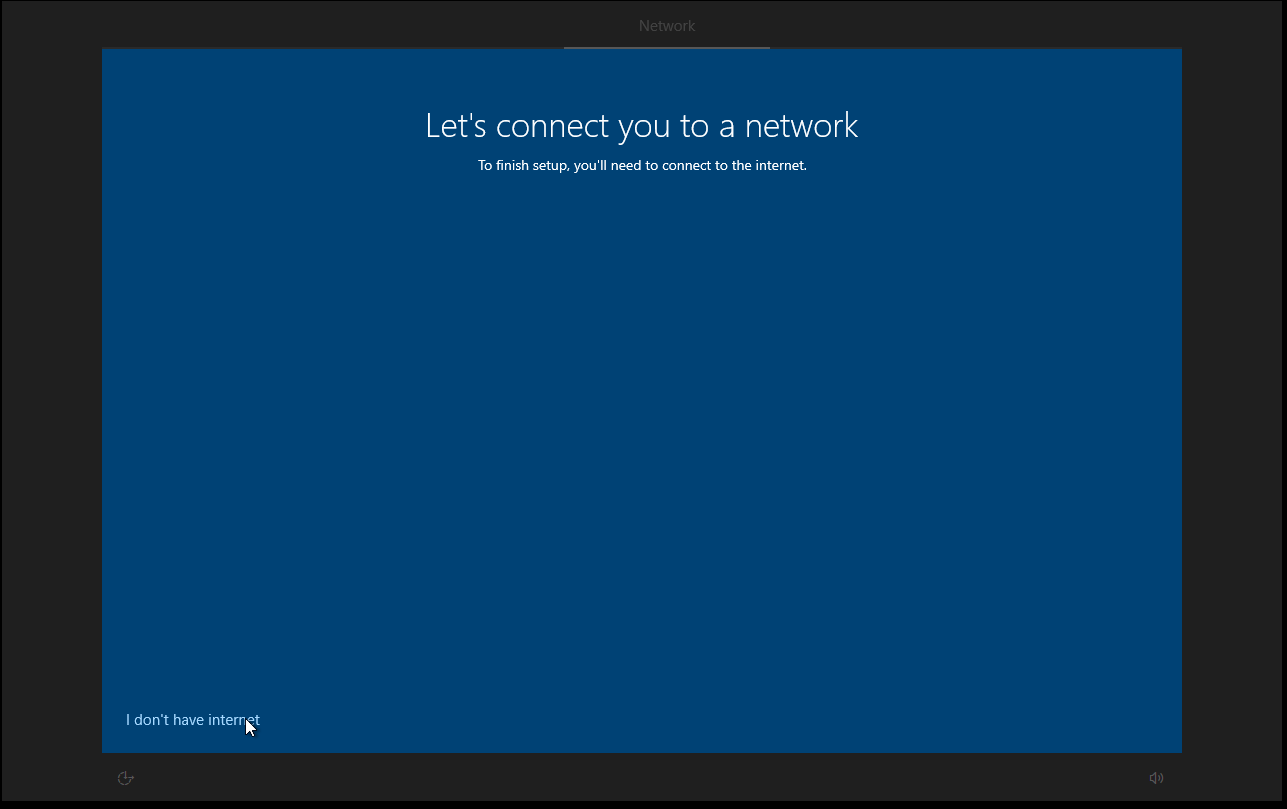
Click I don't have Internet.
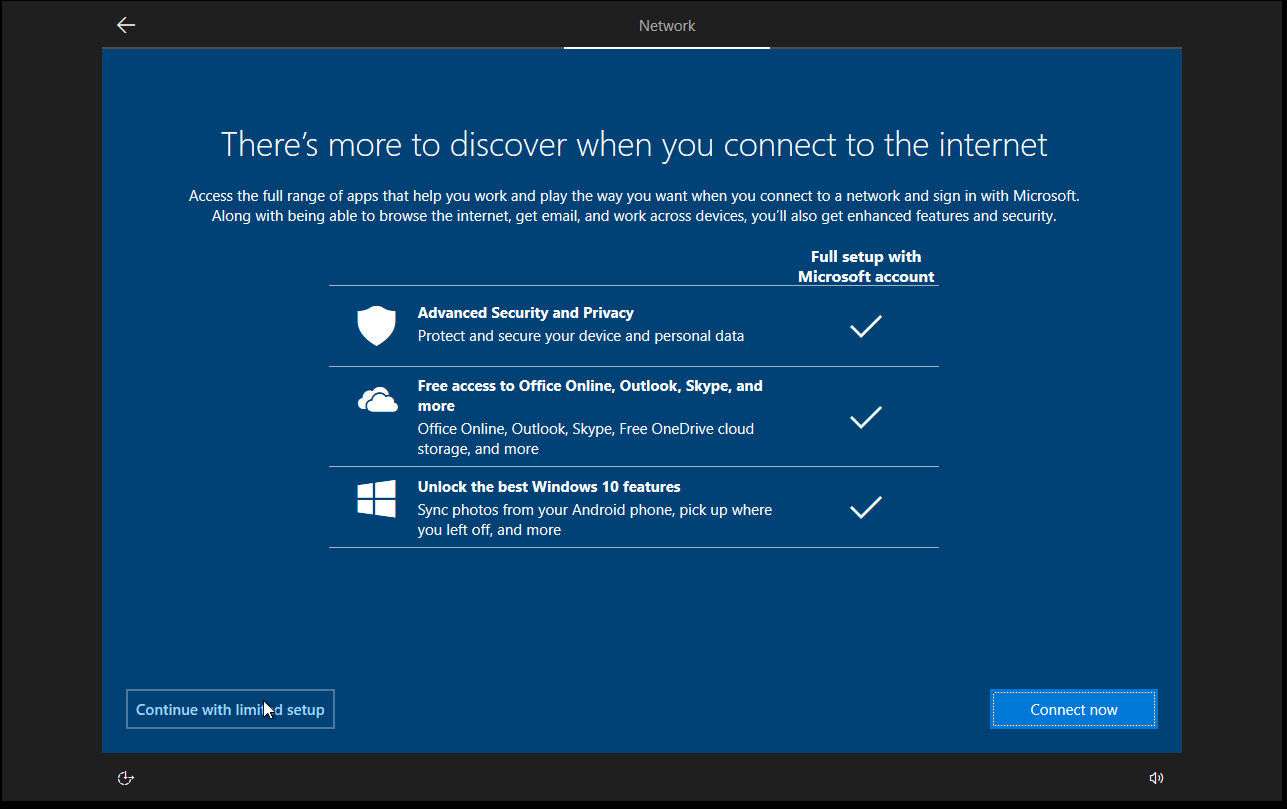
Click Continue with limited setup.
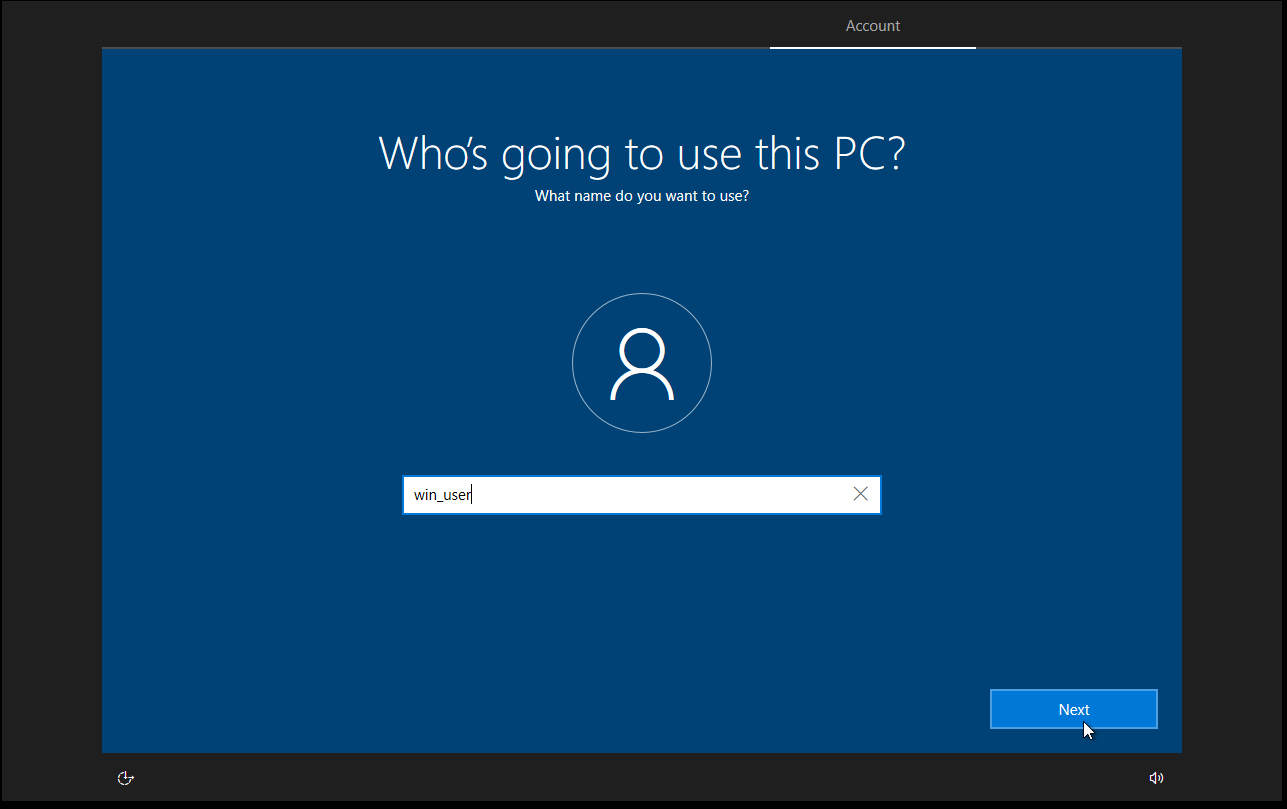
Fill in your chosen username.
Fill in your password.
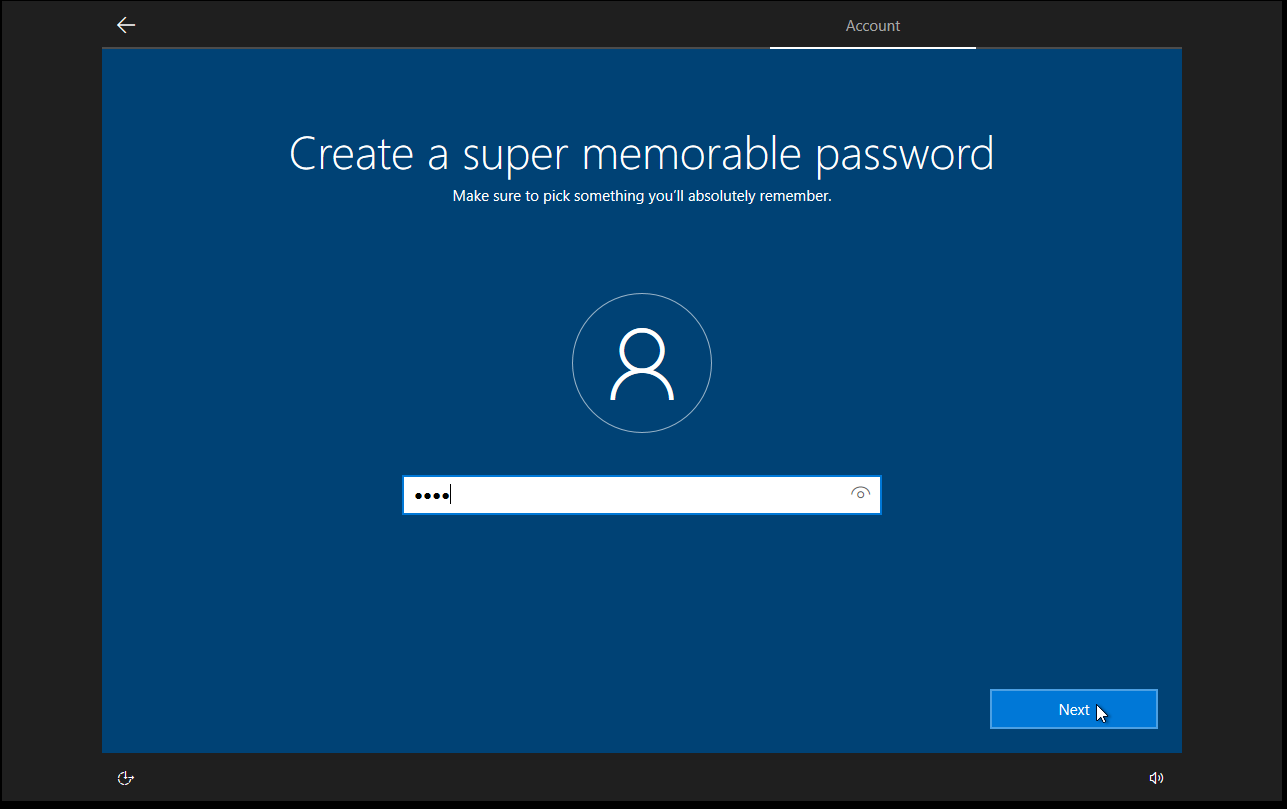
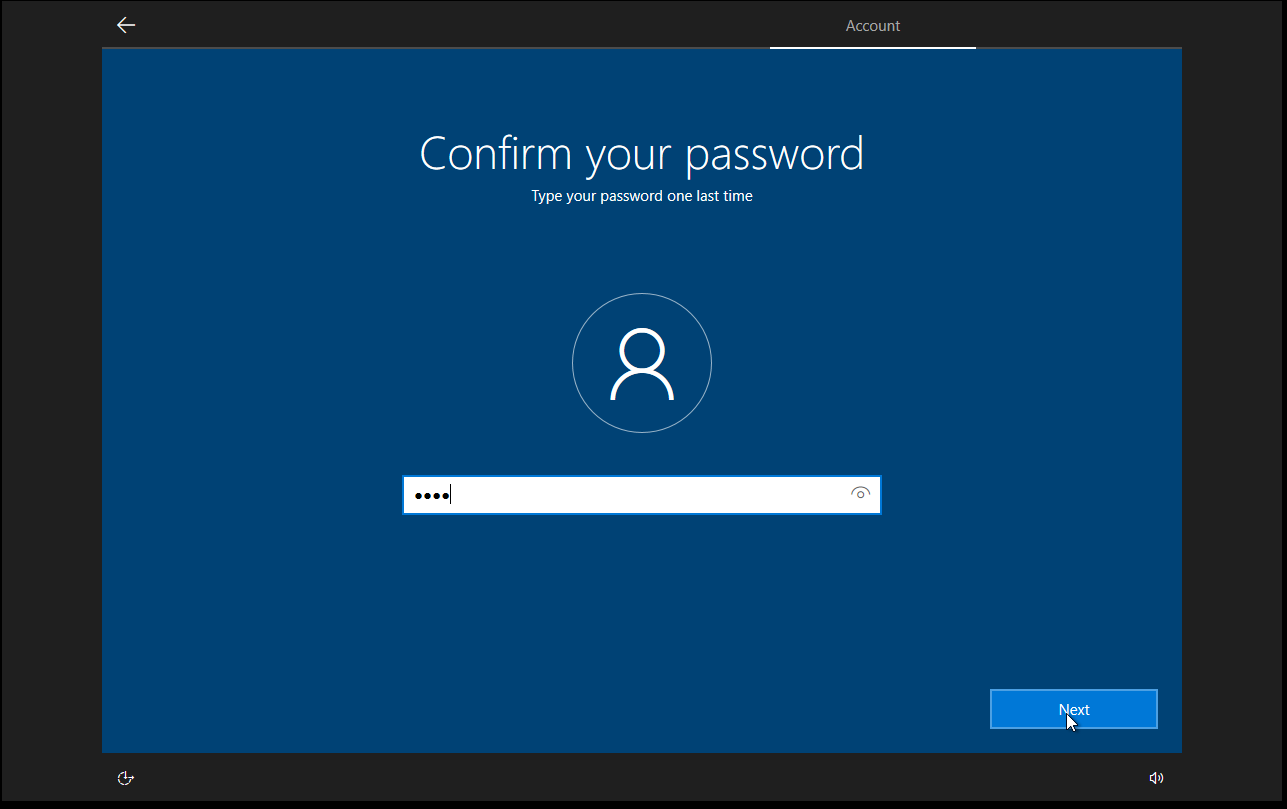
Confirm your password.
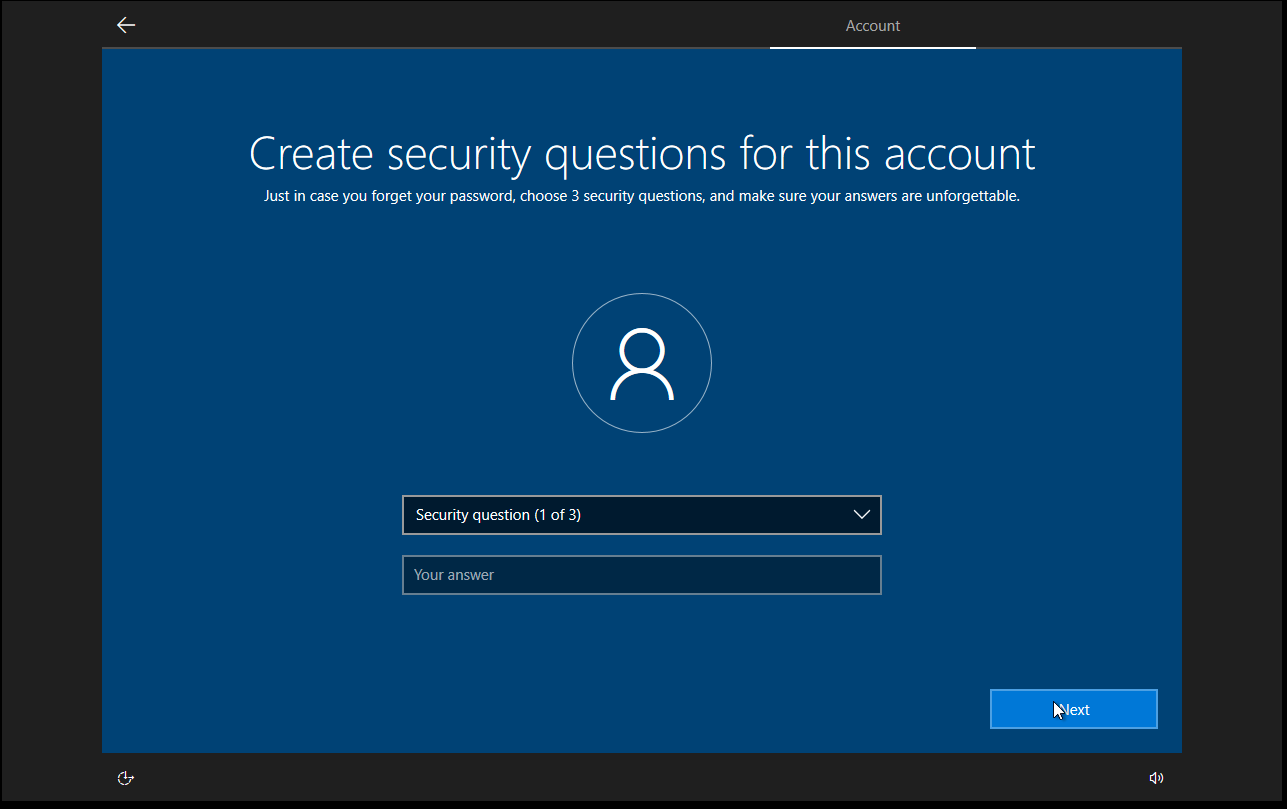
Fill in whatever security questions you want; I use cat input for the security questions, so they’re unusable.
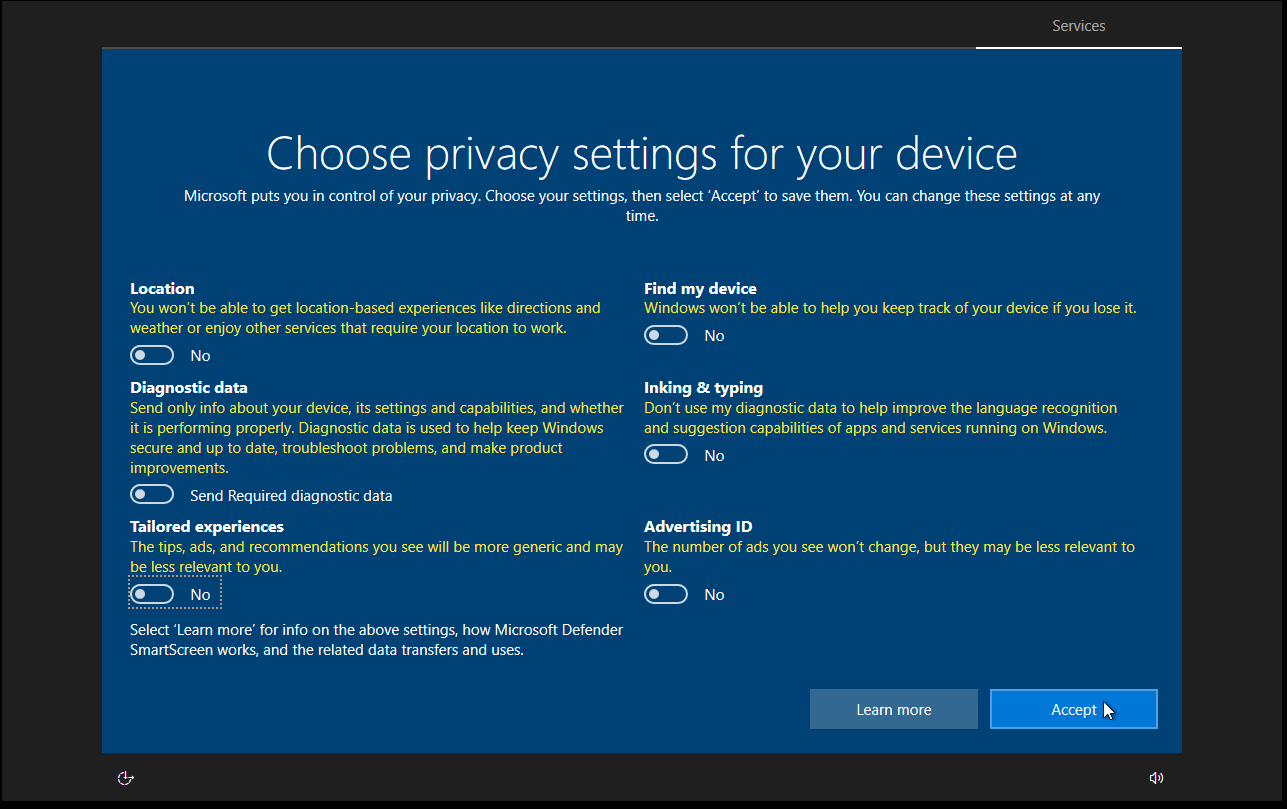
Choose your privacy settings, even though it will probably ignore them.
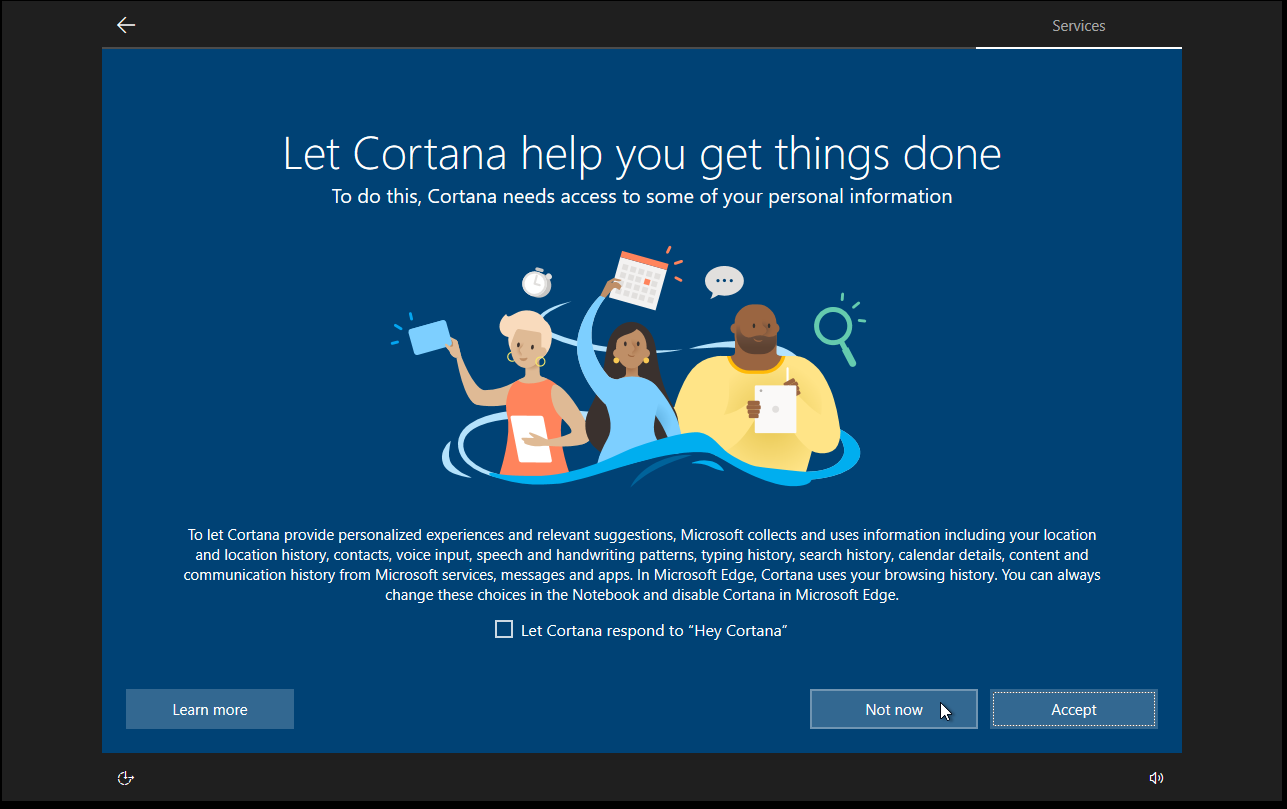
Choose what to do with Cortana.
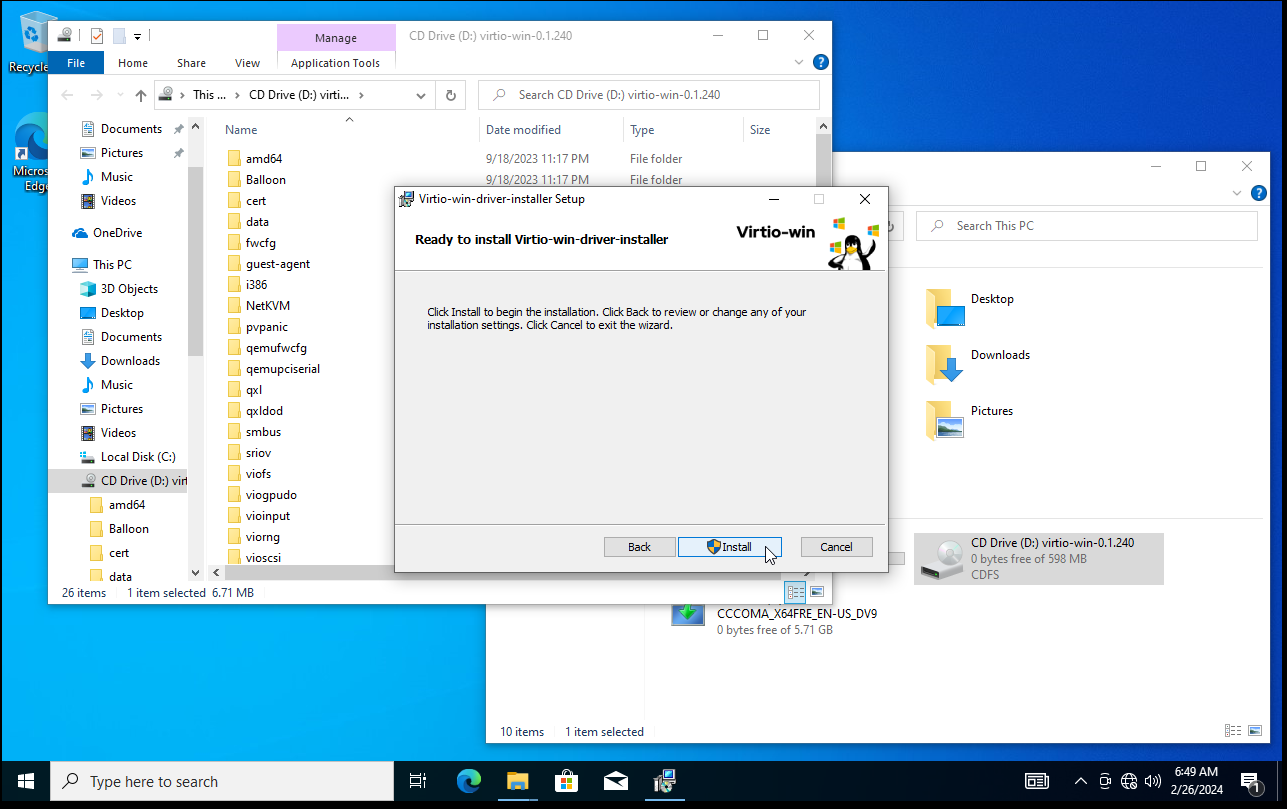
Navigate to the mounted virtio-win.iso under D:, then launch virtio-win-gt-x64.exe.
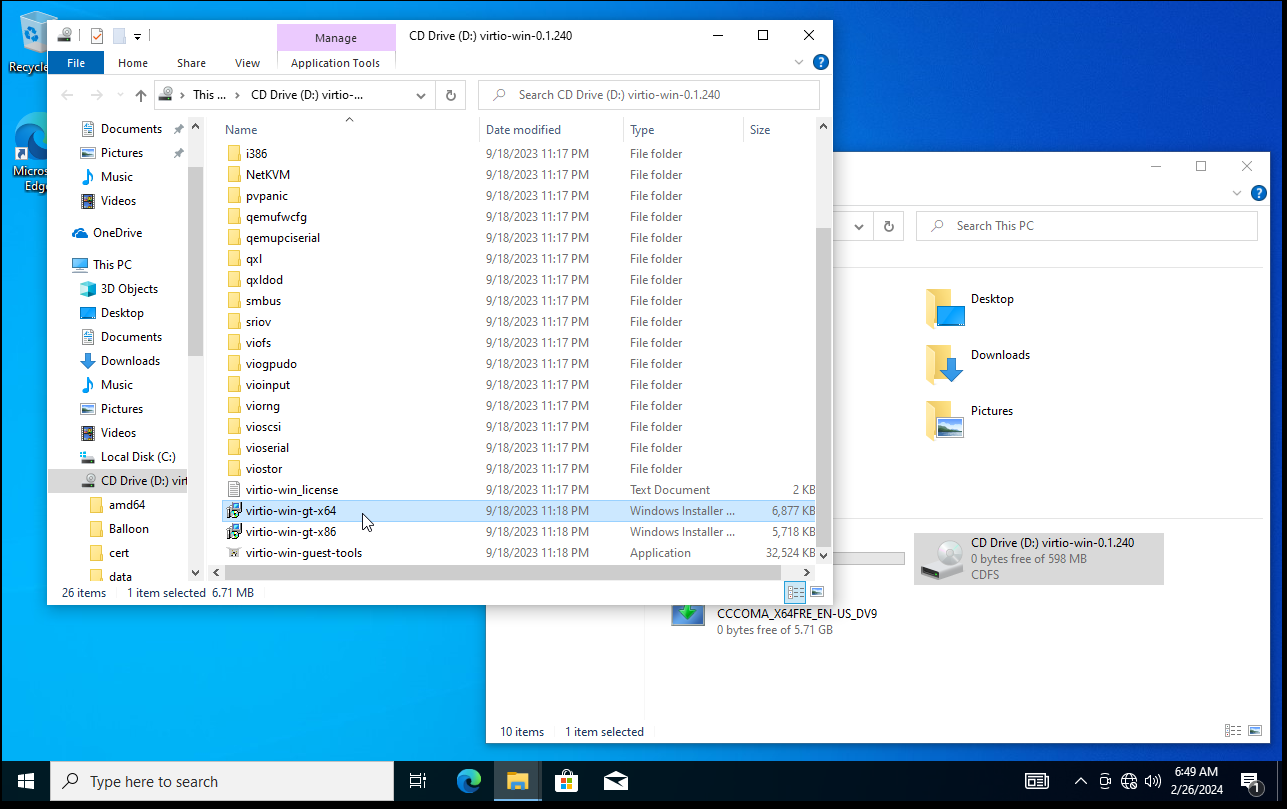
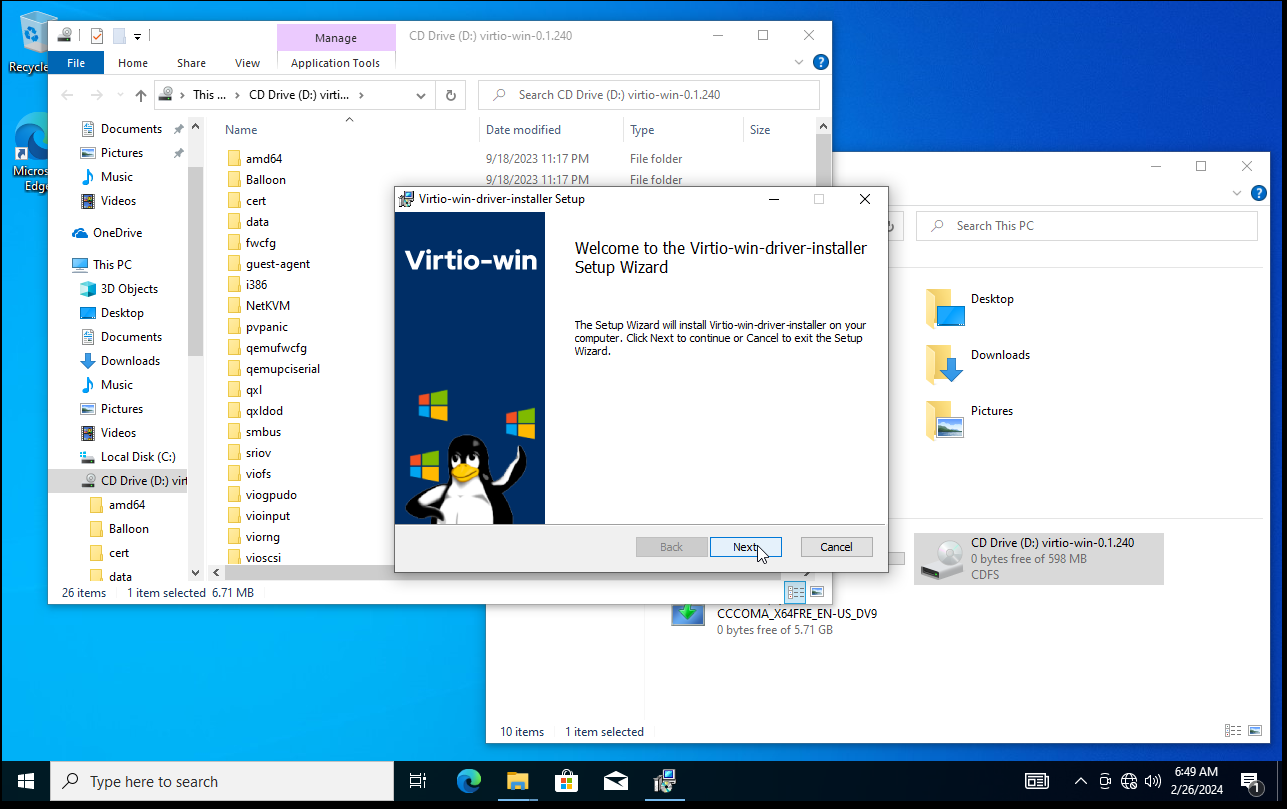
Click Next.
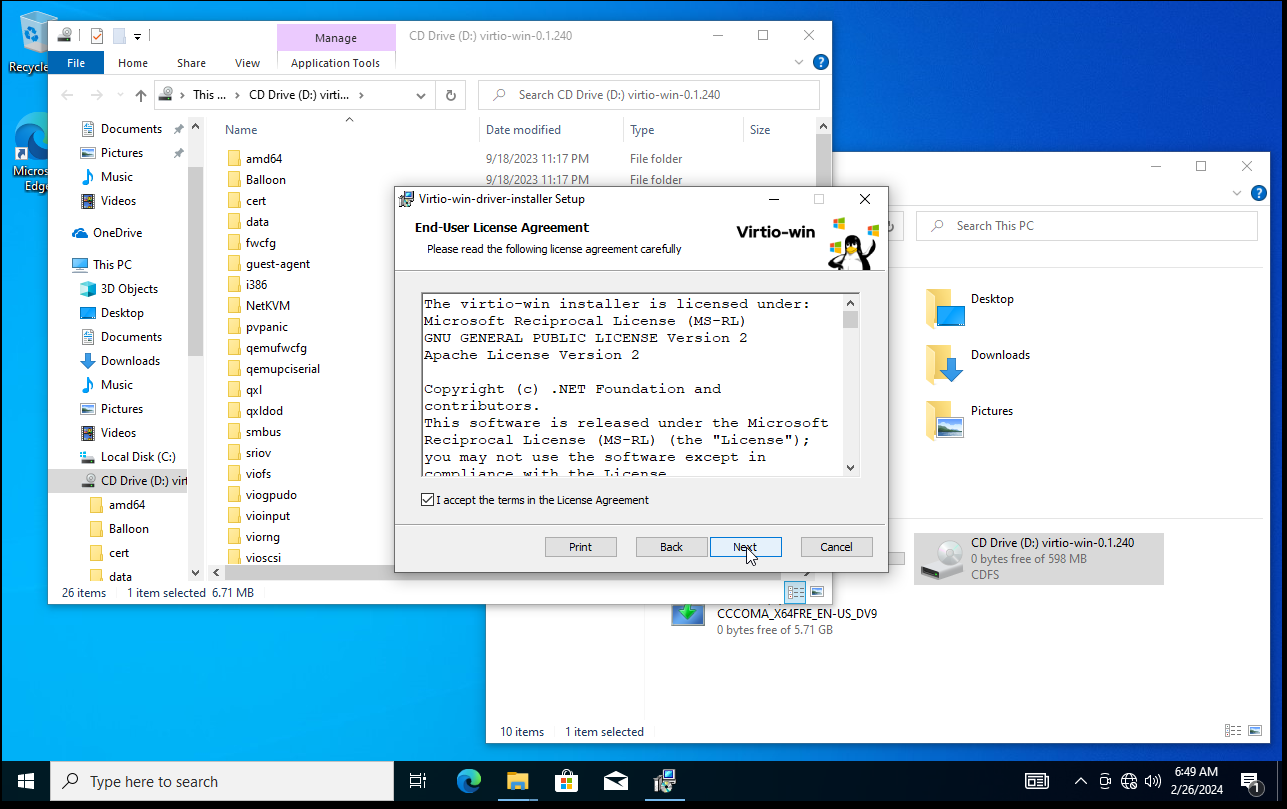
Accept the agreement and click Next.
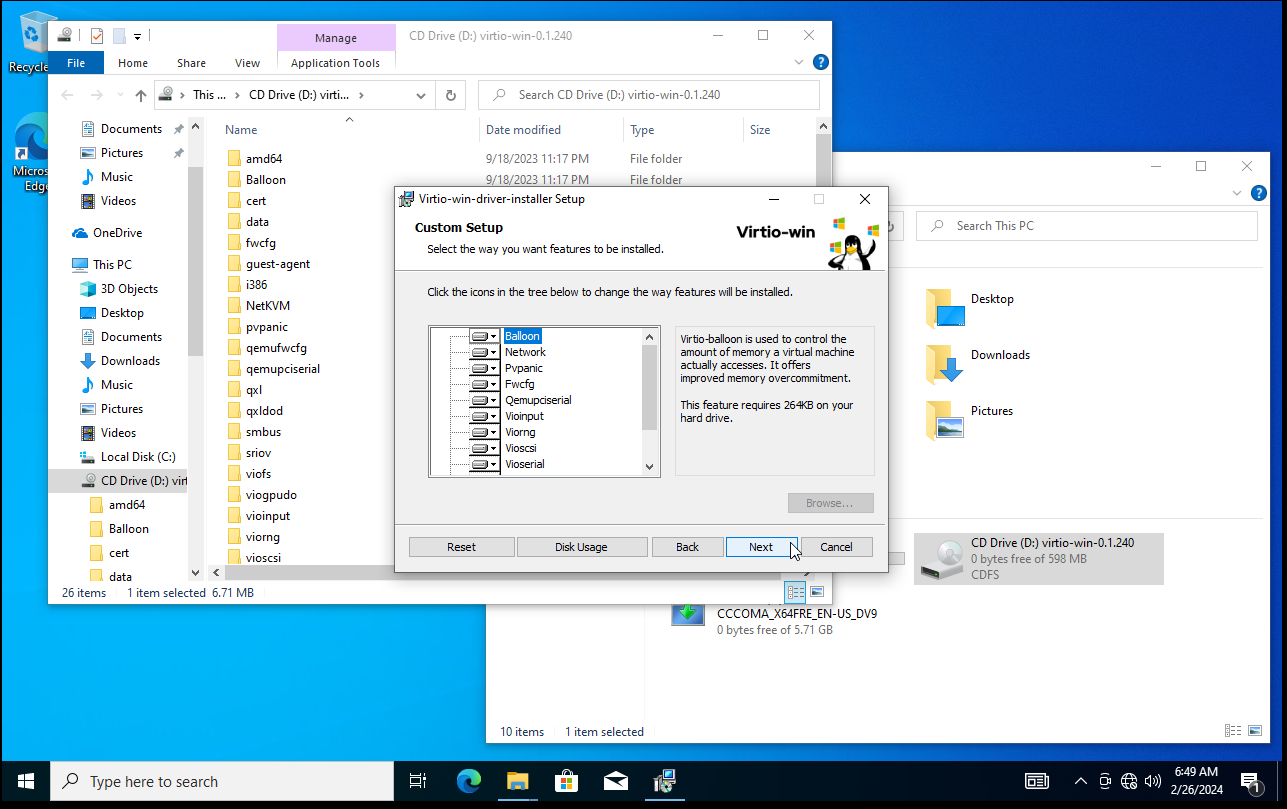
Click Next.
Click Install.
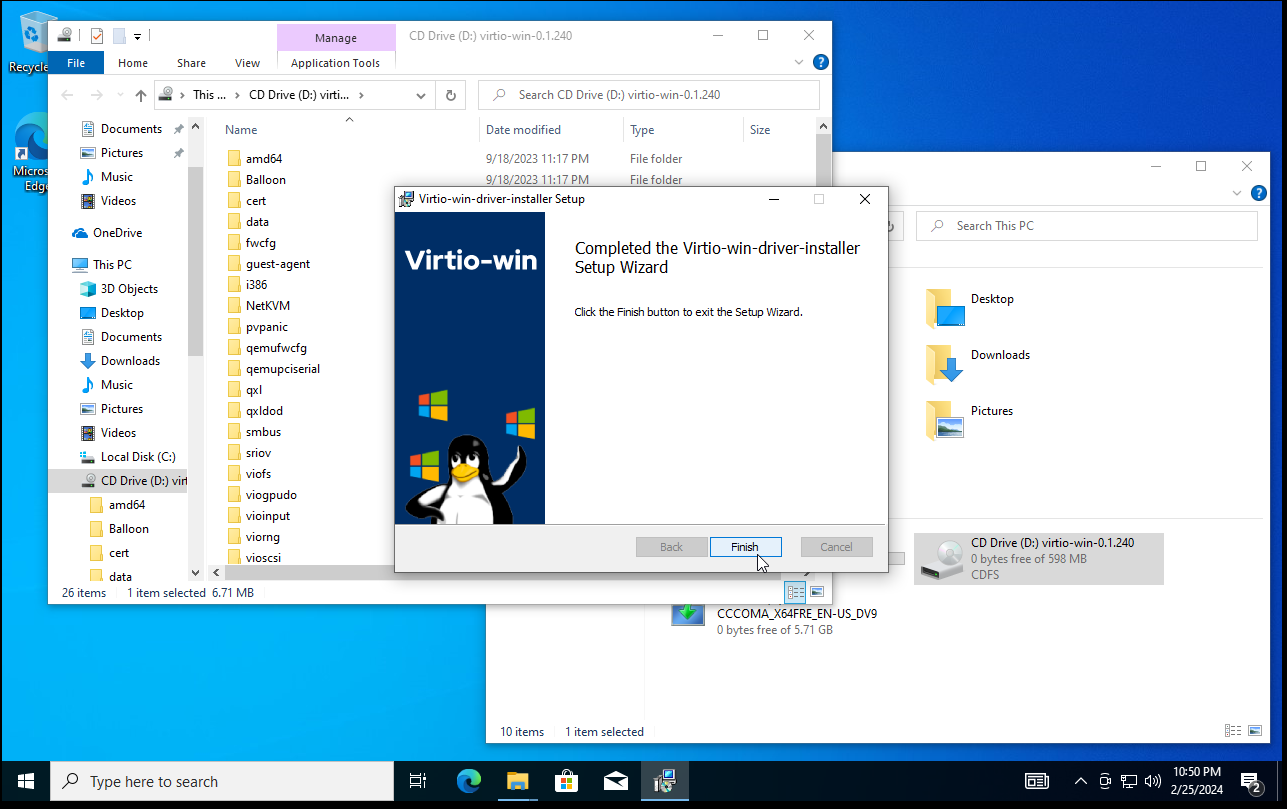
Click Finish.
Install Looking Glass
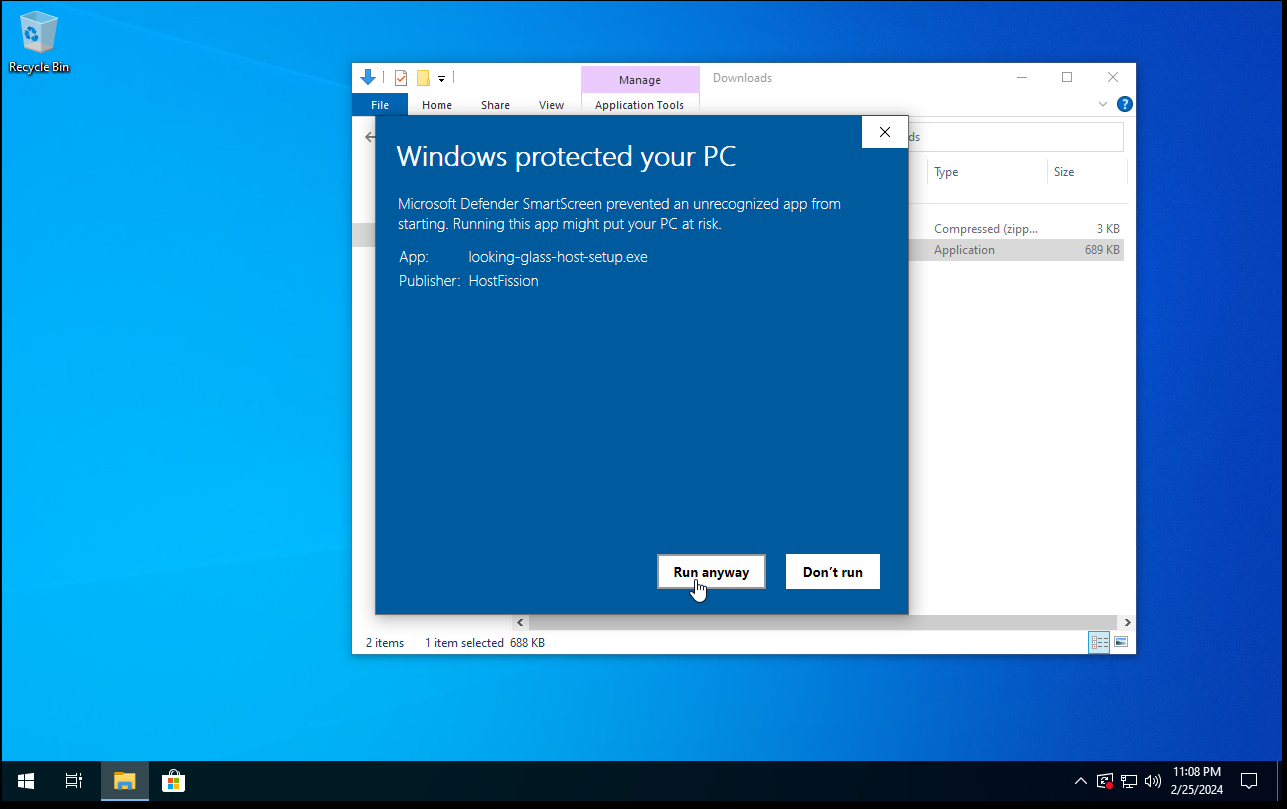
Download the Windows Looking Glass Host binary in the virtual machine; the binary is available here. Run the downloaded Looking Glass host setup binary. Microsoft Defender will stop the execution of the binary; click More info then Run anyway.
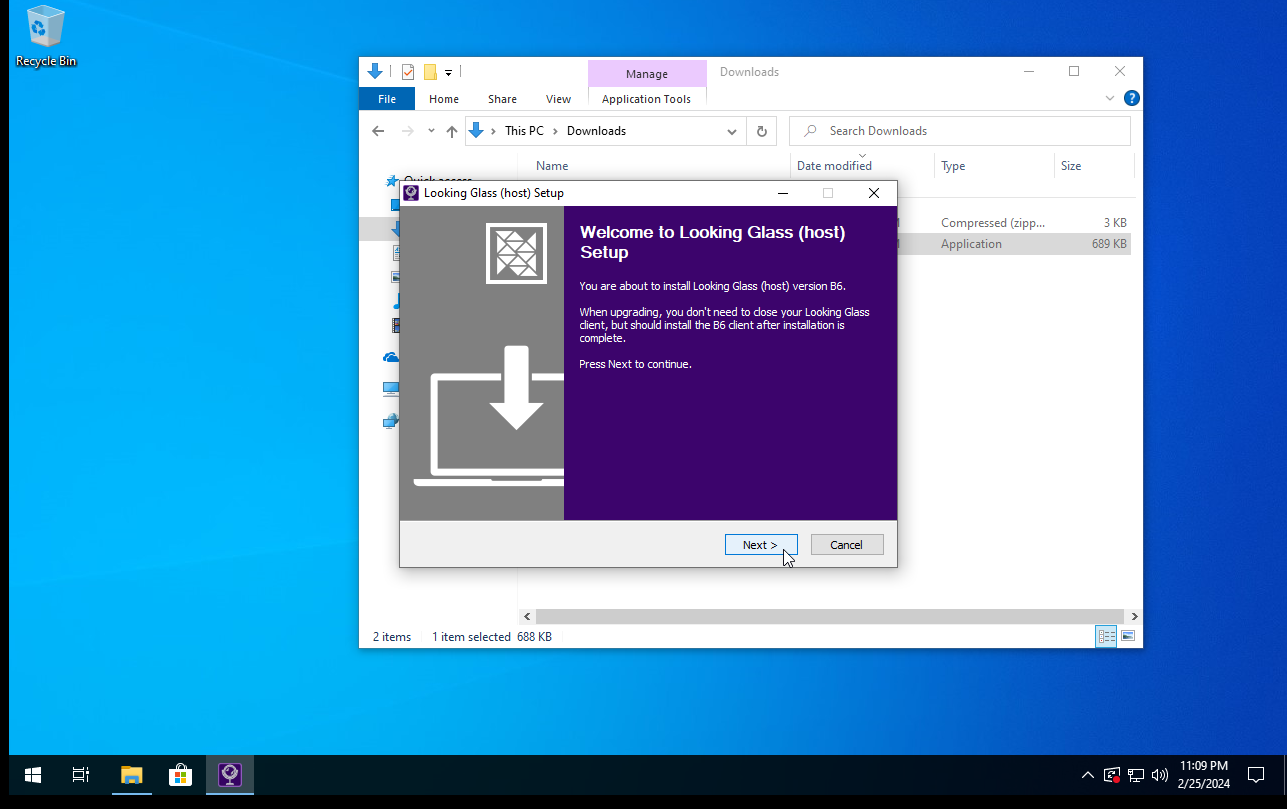
Click Next.
Click Agree.
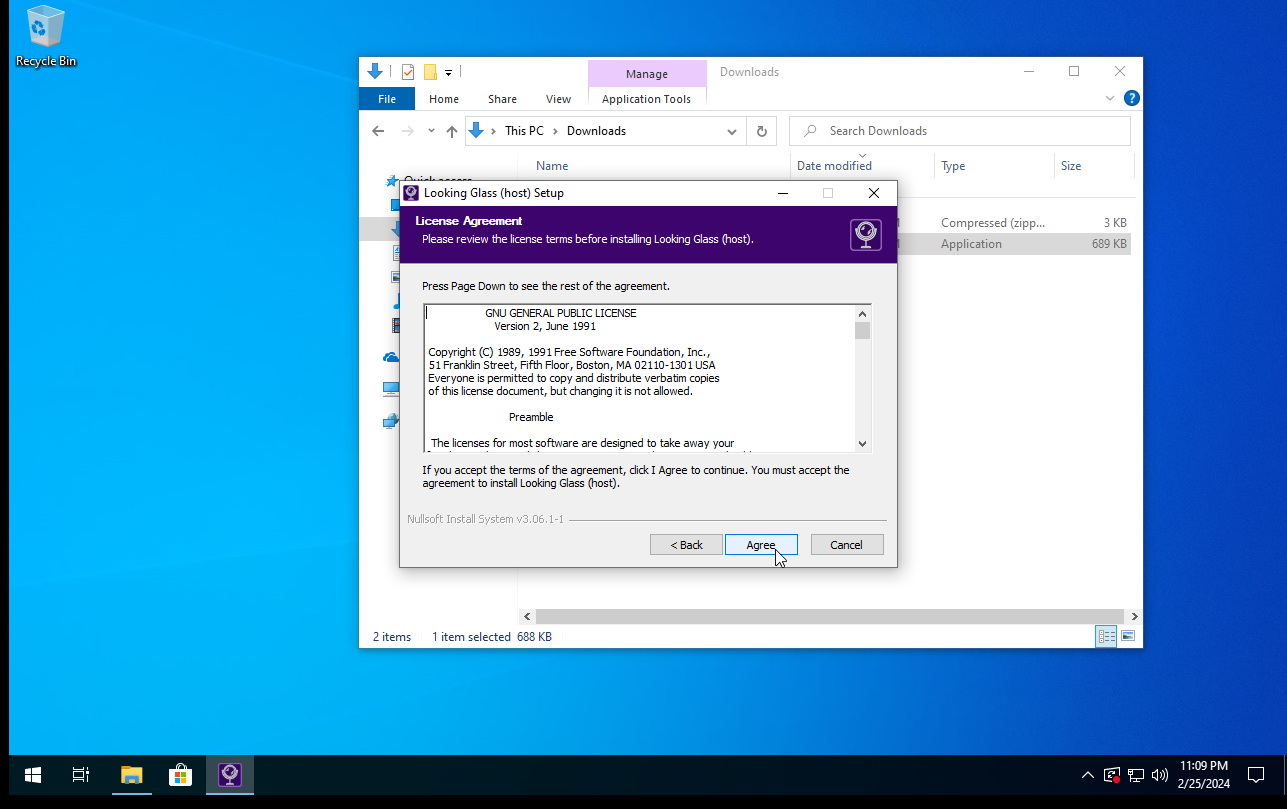
Click Next.
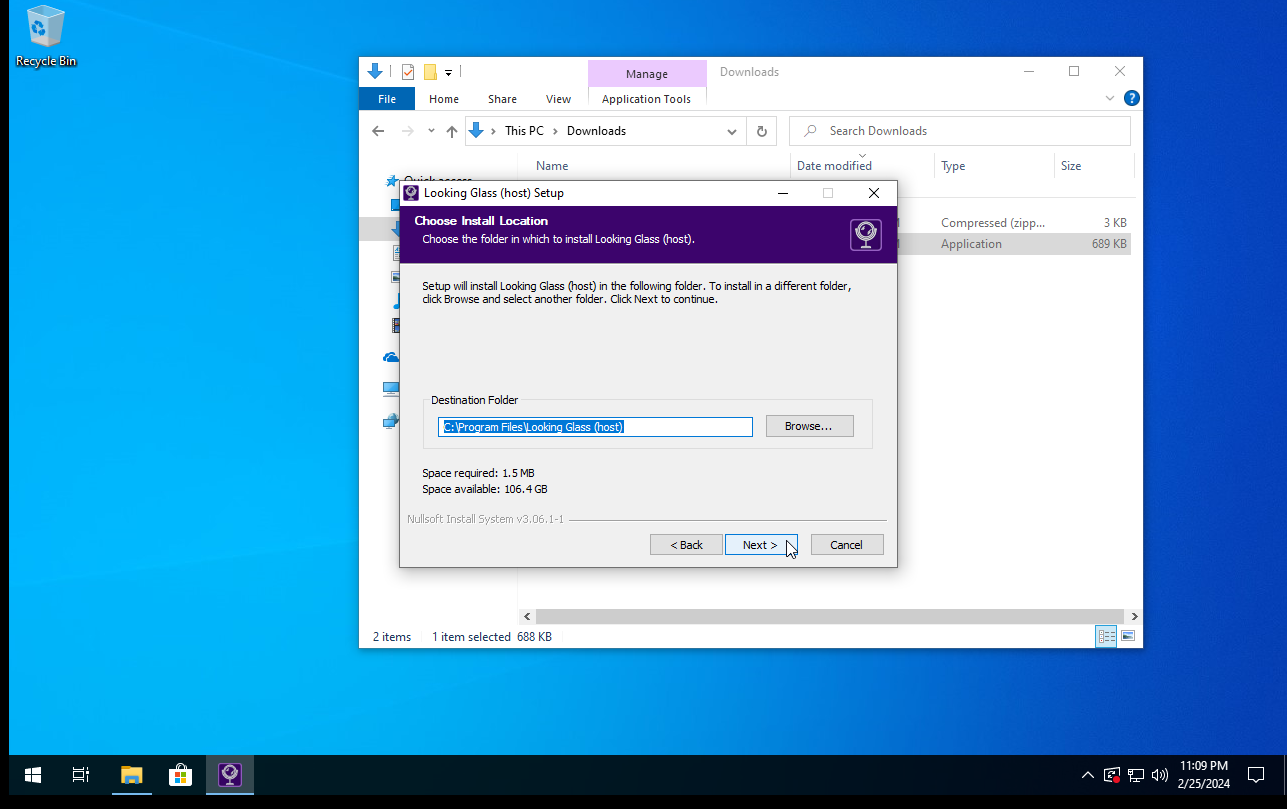
Click Install.
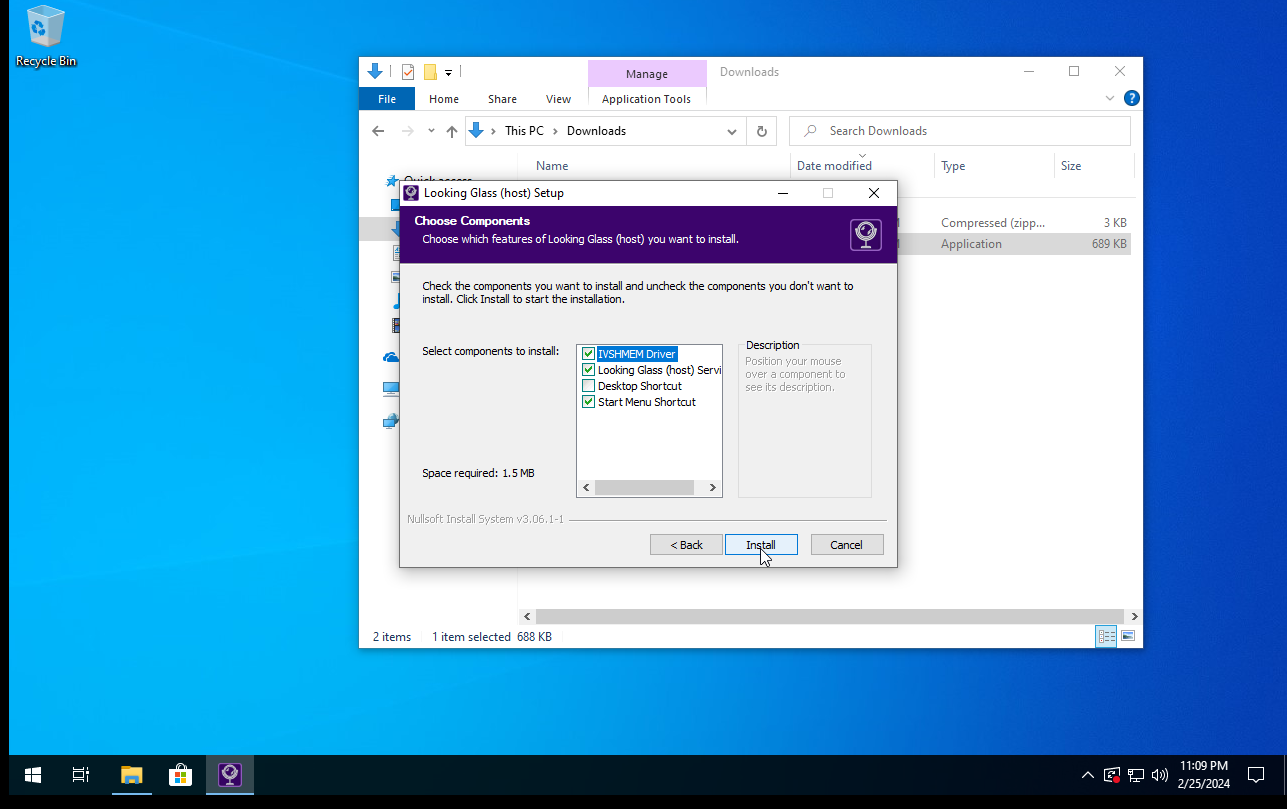
Click Close.
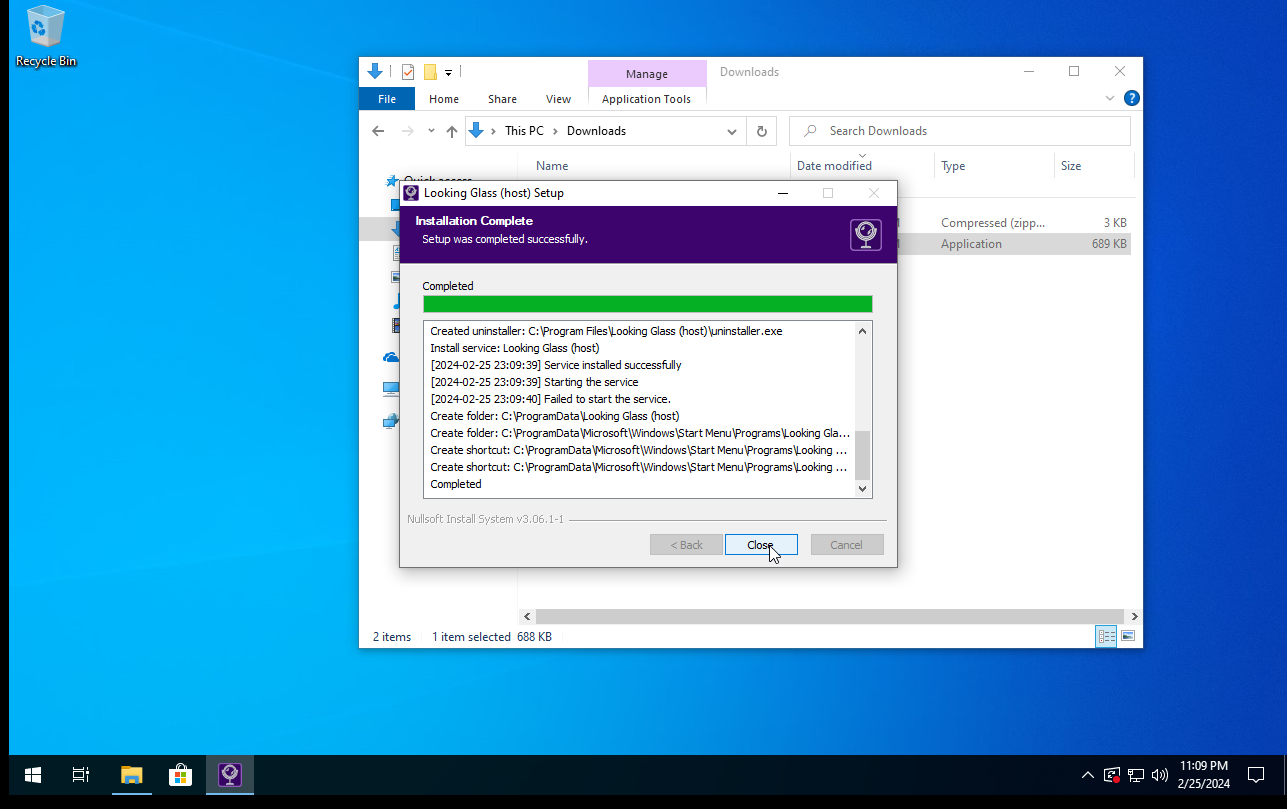
After installing Looking Glass, shut down Windows.
Enable Passthrough
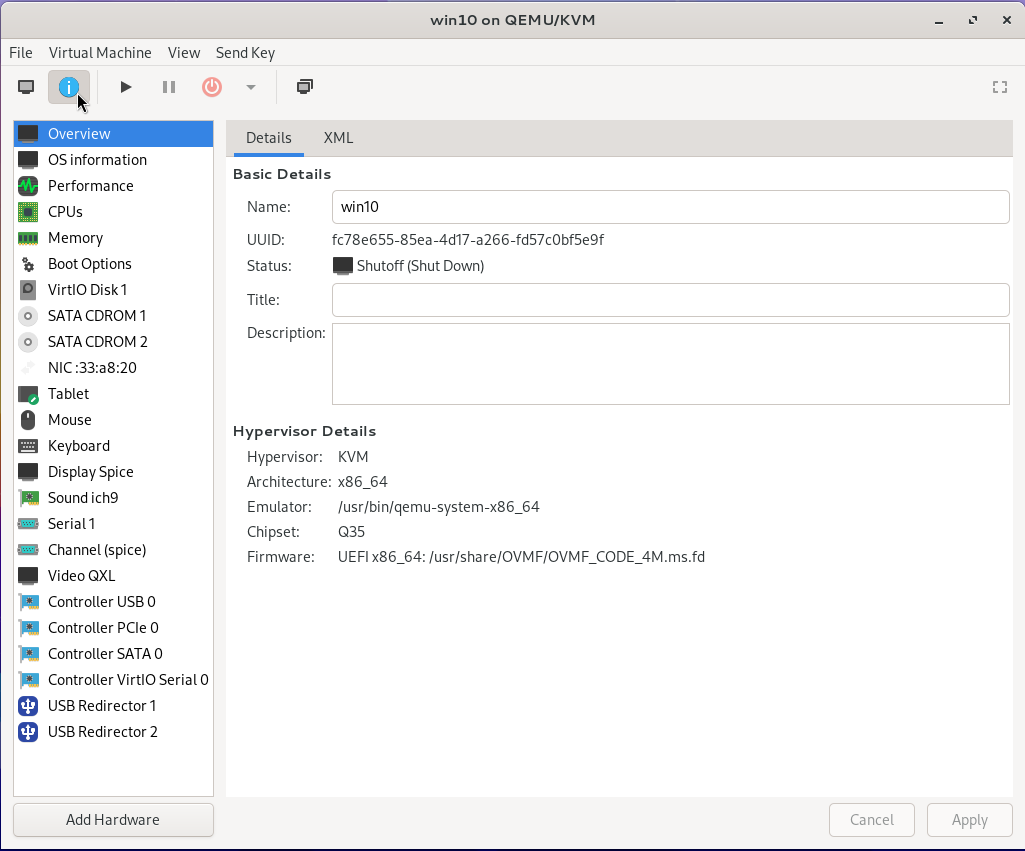
Open the Windows virtual machine and click the hardware information button from the top toolbar.
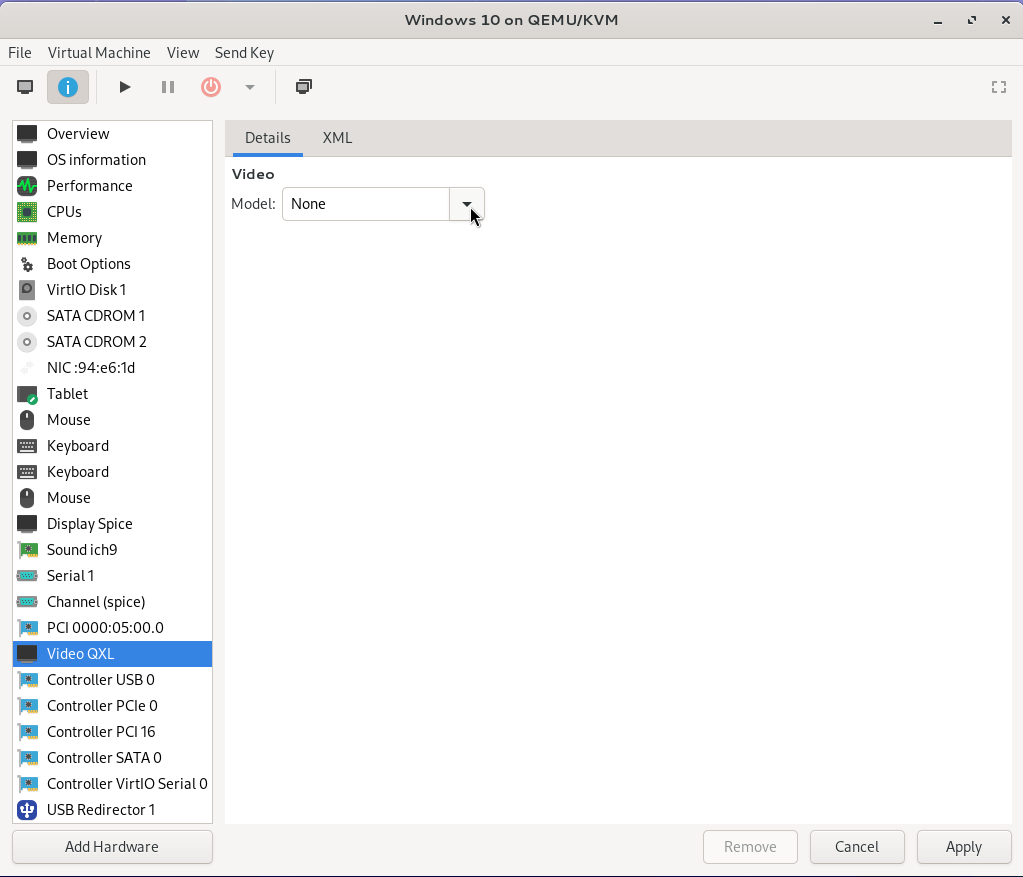
Click Video QXL from the sidebar and change the model to None.
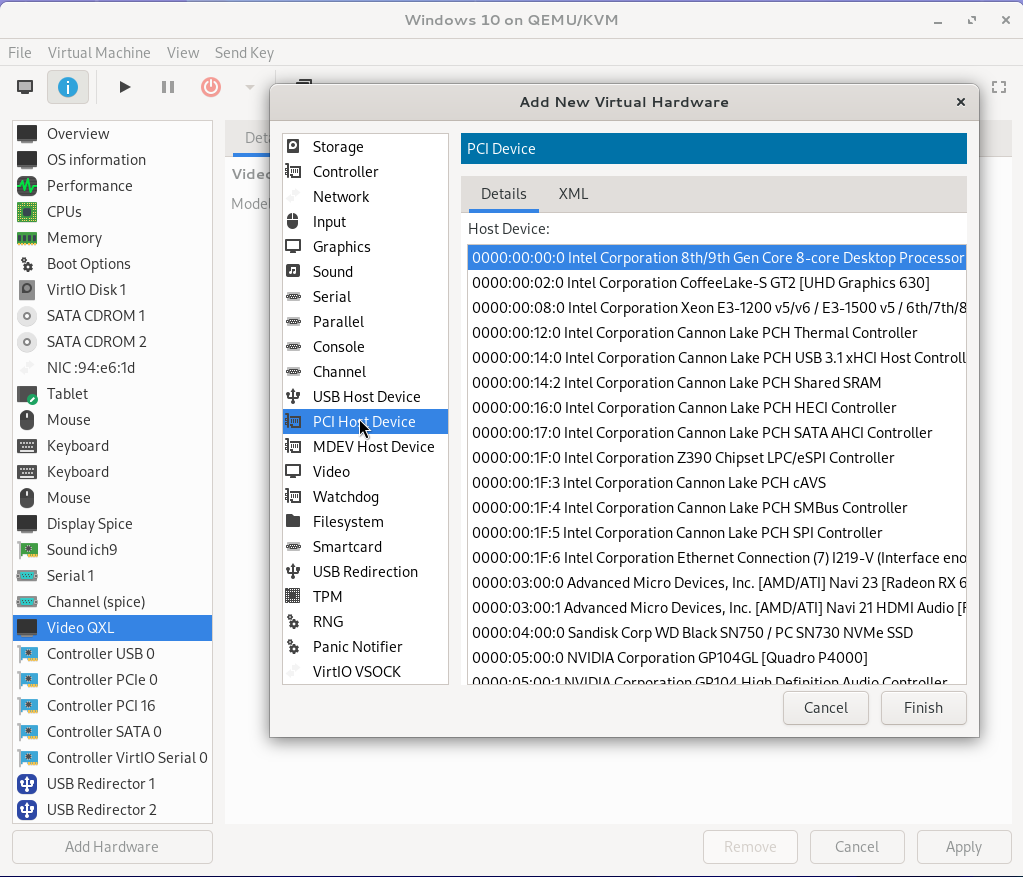
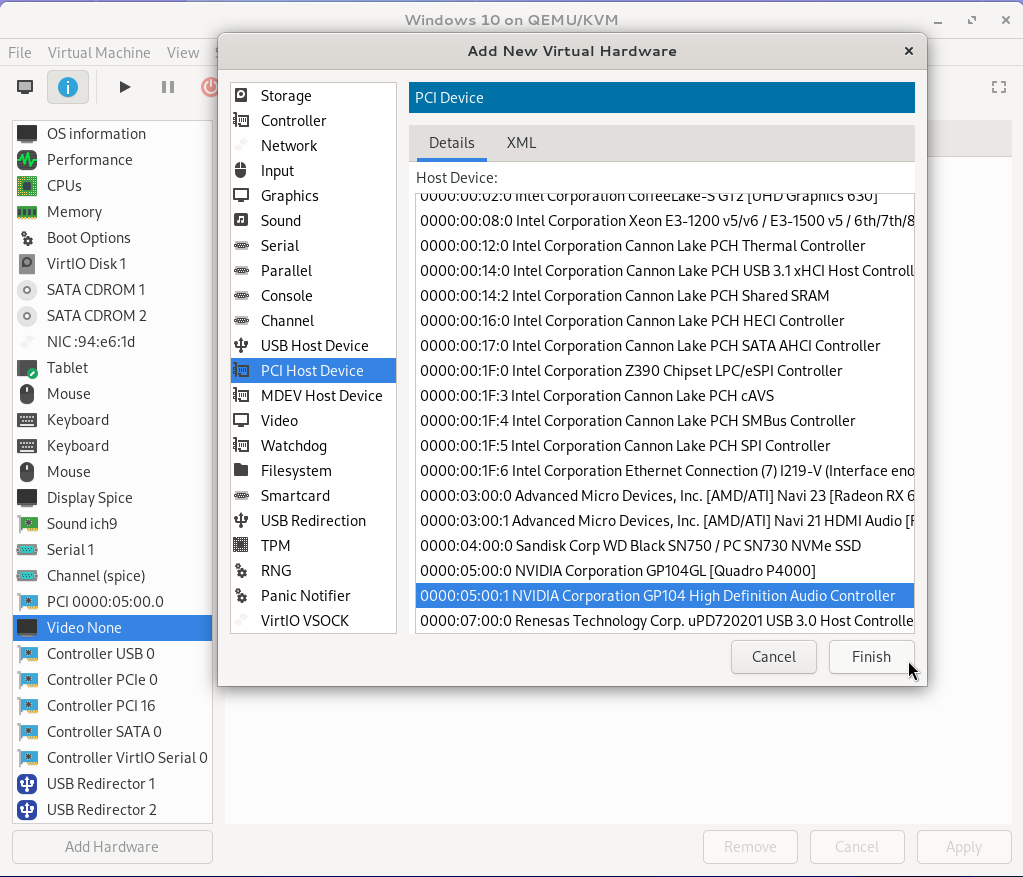
Click Add Hardware from the bottom of the sidebar and choose `PCI Host Device from the dialog’s sidebar.
Find the GPU you chose to pass through to the virtual machine from the list and click Finish.
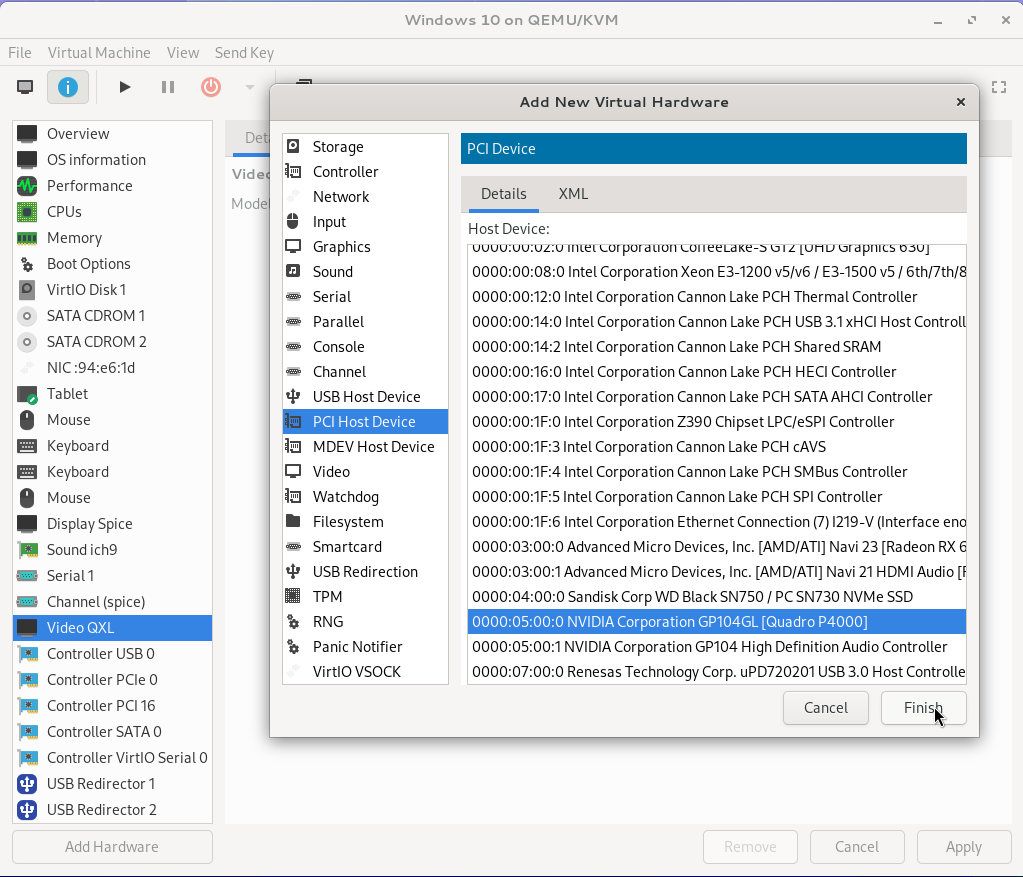
Repeat the process and find the audio controller belonging to the GPU.
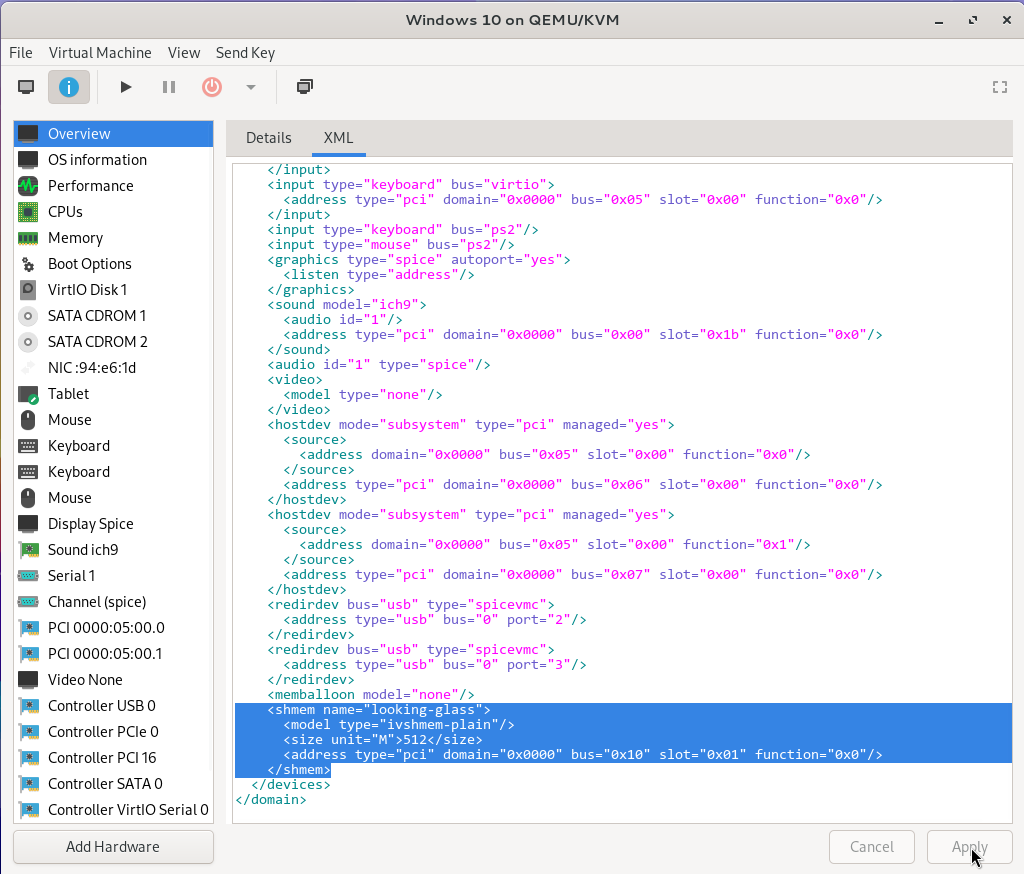
Click Overview, then click the XML tab, scroll to the bottom, and find the closing tag </devices>. Above it, paste the following contents, then click Apply. Note that when you click Apply, the line will edit to include the PCI part seen in the image below.
1<shmem name="looking-glass">
2	<model type="ivshmem-plain"/>
3	<size unit="M">512</size>
4</shmem>
After you finish changing all of the above settings, you should be able to boot the virtual machine and launch Looking Glass; you’ll want to ensure that you have your dummy plug plugged in the chosen GPU before you boot it.


